Showing posts with label Cake. Show all posts

Thursday, 8 October 2015

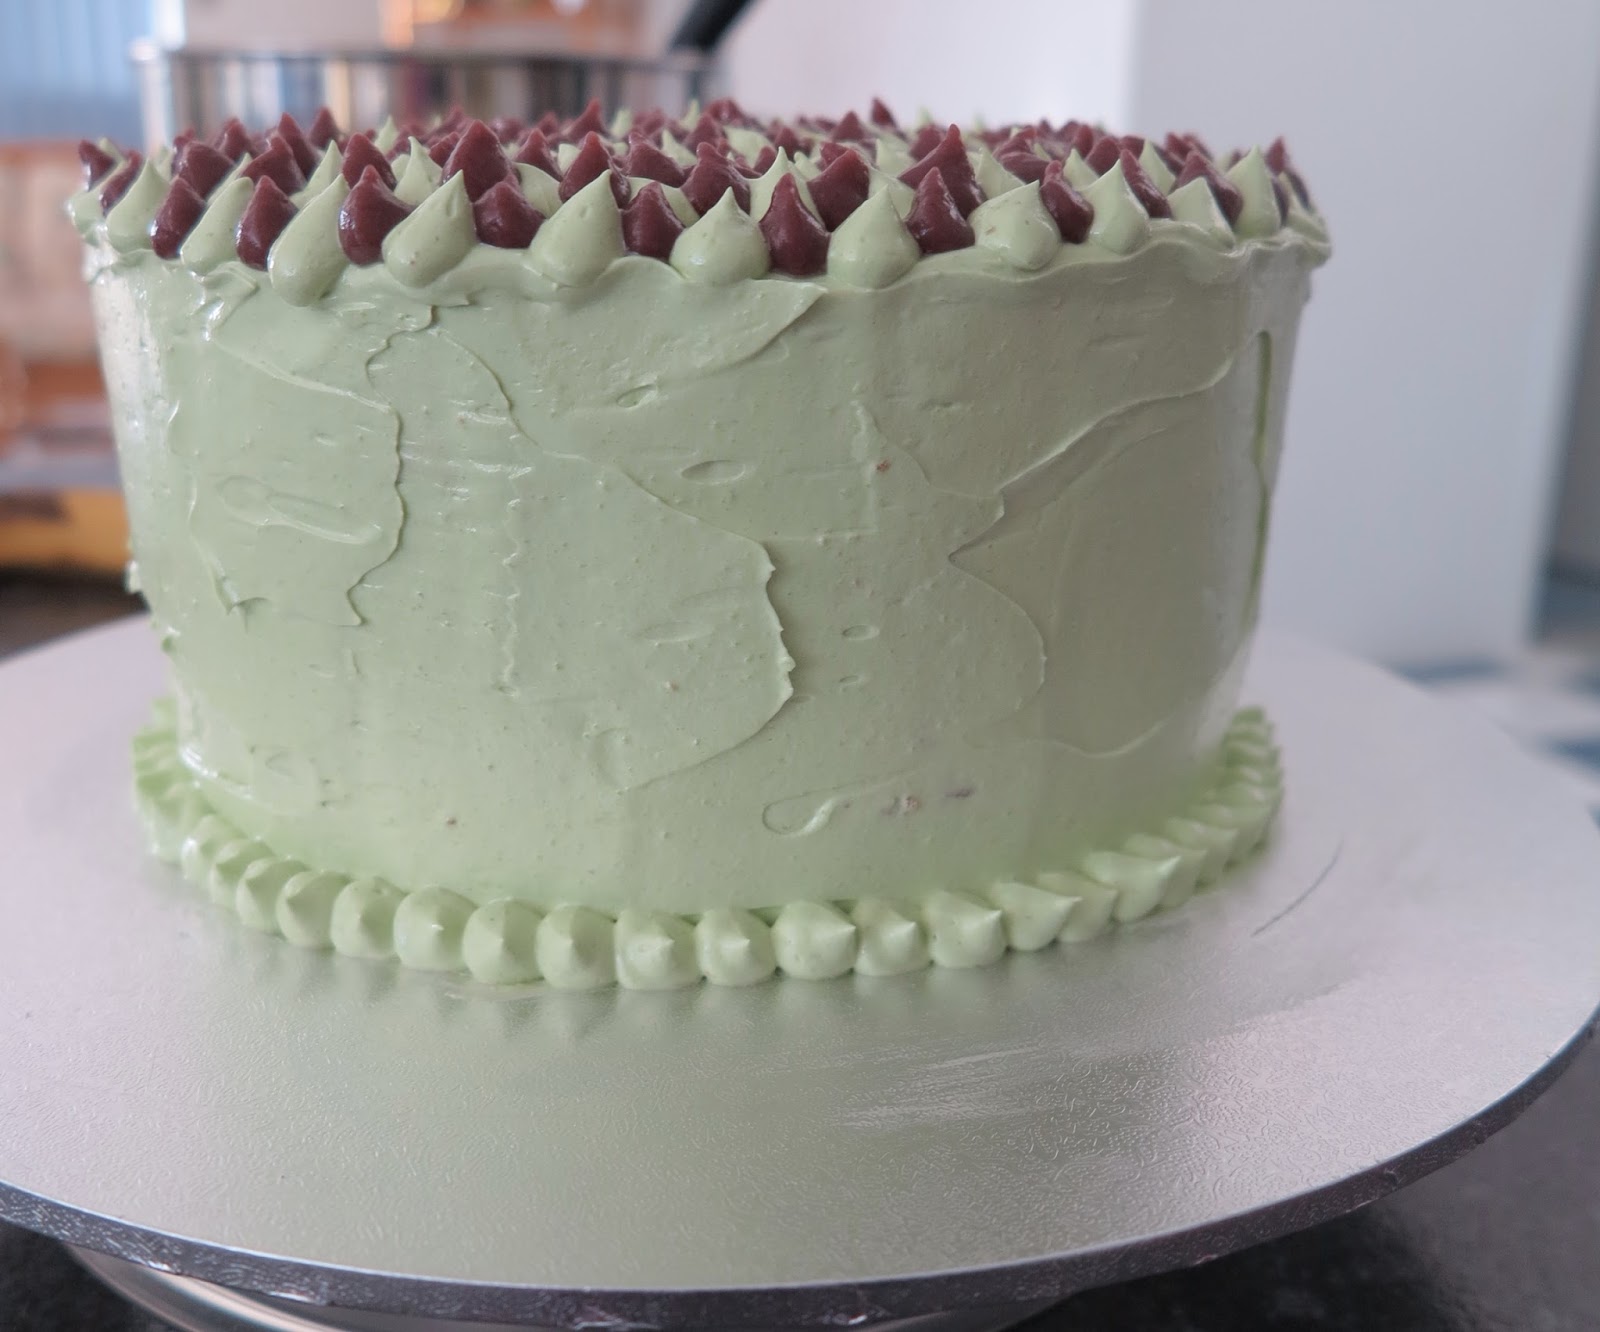
How To: Red Bean Cake with Matcha (Green Tea) Buttercream Frosting

Hi Nibblers!

            Have you ever had something where you just couldn't understand what the fuss was all about? I did. And it was anything Matcha (green tea) flavoured. I couldn't get into it no matter how hard I tried. I was all about that black sesame craze. Until one day, Kevin bought me a Starbucks Matcha Latte while we were on a holiday in the Gold Coast and something just clicked. I was in love. 
    I couldn't stop thinking about it. I wanted more Matcha flavoured things. As soon as we came back to Sydney, I wanted to dedicate specific days to have Matcha adventures. I stumbled in Chanoma - a Japanese style cafe which did all kinds of Matcha goodness. It became a weekly ritual back in uni where Tree and I would visit just because. It's been a while since I've gone back. 
    So I've decided to celebrate my love for Matcha by making a cake. I paired the Matcha butter cream frosting with a Red Bean cake - one of the best flavour pairings in this sweet world. Hope you love this little creation!

How To: Red Bean Cake with Matcha (Green Tea) Buttercream Frosting


What you'll need:
Makes a 3 tired cake - Takes approximately 4 hours including cooling / decorating time
Red Bean Cake Component:
- 12 eggs (separated into whites and yolk)
- 1 1/2 tsp. cream of tartar
- 275g of sugar
- 360g self-raising flour
- 180mL of vegetable oil
- 180mL of milk
- 2 tsp. vanilla sugar
- 75g cooked Adzuki - Red Beans * see 'Red Bean Paste' section
- 3 drops of red food colouring - optional
Red Bean Paste:
- 200g Adzuki - Red Beans - soaked for at least an hour before cooking
- 150g white sugar
Matcha (Green Tea) Buttercream Frosting:
- 200g icing sugar
- 500g butter (softened to room temperature)
- 30g Matcha Green Tea Latte Mix
- 2 Tbs. milk
- 1 drop of Green colouring - optional

How To:
Red Bean Paste: 
Ready to be made into a paste!
1. Boil 500mL of water then add soaked Adzuki Beans into the pot and leave to simmer for approx. 40 minutes with the lid on - stirring occasionally - until beans a soft all the way through
2. Drain beans in a colander and set aside approx 75g of cooked Azuki beans for cake mixture
3. Return the rest of the beans to pot on a low heat then add sugar
4. Stir until well incorporated
5. Pop mixture into a blender and blend until it forms a consistency of peanut butter - takes about a minute in the blender
6. Pour red bean paste into a mixing bowl then set aside to cool to room temperature 
Red Bean Cake Component:
1. Pre-heat oven to 160 degrees Celcius/ 320 degrees Farenheit fan forced
2. Line three circular 20cm cake tins with baking paper or lightly spray with cooking oil to prevent cake from sticking to the pan
Mixing in the Adzuki beans
3. Beat egg whites until soft peaks form then add sugar and continue beating until it forms a bloody stiff peak finish - approx. 10 minutes of a high beat setting
4. In a separate mixing bowl, beat egg yolks until it changes from a deep orange to a light beige colour - takes approx. 5 minutes
5. Add oil and milk to egg yolk mixture and beat until well incorporated
6. Add vanilla sugar and cream of tartar to the mix and beat
7. Using a spatula, gently fold flour and egg white/ sugar folds in small little increments - it takes time but allows for mixture to stay aerated and soft
8. Continue step 7 until all flour and egg white/ sugar mix is well incorporated
9. Add cooked Adzuki beans and red food colouring to the cake batter and fold until well combined
10. Evenly divide batter into cake tins ensuring all batter is spread evenly along the edges of the cake tin - lightly tap tins on a flat surface if you need that extra push
11. Place tins in pre heated oven for approximately 35-45 minutes - swapping cake tin positions at around 25 minutes to ensure all layers are baked evenly 
12. At 35 minutes check if cakes are cooked by placing skewer into each cake layer and skewer comes out clean - if no, leave cakes to cook for a further 5 minutes then check again
13. Allow cakes to rest in tins for 5 minutes then transfer onto cooling rack and set aside until cooked - spread up the process by placing cakes in the freezer for up to an hour
Matcha Green Tea Buttercream frosting:
1. Beat softened butter until  it turns from a yellow butter colour to and off white colour - Takes approx. 7 minutes in high
2. Add icing sugar to the mix and beat until well incorporated
3. Add Matcha Latter mix to frosting and well for a further 5 minutes
4. Add milk and green food colouring and beat for a further 5 minutes until well combined
Note: if you feel the frosting is too dense, just add a Tbs. of milk and mix until desired texture
          If it's too soft, add a heaped Tbs. of icing sugar to thicken the frosting

Cake scraps to be eaten, nom
Once all cakes and pastes are cooked, it's decorating time! Feel free to decorate however you like but if you liked how mine turned out, here's how:
1. Level cakes as identical and flat as possible
2. Place one tier on a cake board then even spread a layer of red bean paste
3. Place 2nd tier on top and spread an even layer of red bean
4. Place 3rd layer of cake then using the Matcha buttercream, evenly coat cake to create a crumb coat layer
5. Place in freezer for 15 minutes to set
Building my layers
6. Add more Matcha buttercream to the cake until evenly coated around cake
7. For the top of the cake, place red bean paste in one piping bag and Matcha buttercream in another then pipe a small blob around the edges of the cake alternating between the two colours
Note:  If you ever find yourself with left over red bean paste or buttercream frosting, pop them in seperate air tight containers and freeze for up to two months or a week in the fridge! Just defrost and use for your next batch :)
      
       This cake was moist and delicious. I love the sweetness creaminess of Matcha buttercream teamed with the dense sweetness of the red bean paste. I loved this cake and it definitely put me back into the Matcha craze. If you do give this recipe a try, make sure to comment below and let me know how you do!
P.s. I have more cakes coming your way so stay tuned!


Inside snap!


Nibble Away,


Jo

Sunday, 13 April 2014

How to: Chocolate Roll Cake with Coffee Buttercream Filling

Hey Nibblers!

     I've always loved a good roll cake. I always thought they were difficult to make and were way beyond my baking capabilities. But, when a birthday comes along (My Dad's, - Happy Birthday Dad!) I force to challenge myself to step out of my cupcake comfort zone and enter the world of gigantic cakes. And, with no further adieu Nibblers,  I can tell you my attempt was a huge success! Hooray!
    Better yet, this recipe is super quick (if you're on point with your prep work) and easy. It is sure to woo the crowds and have everyone thinking you're a baking goddess. Here's how:


What you'll need:
Chocolate  Roll:
- 75g / 1/2 cup of self-raising flour
- 6 eggs (yolk and whites separated)
- 35g / 1/4 cup of cocoa
- 1 Tbs. milk
- 2 tsp. vanilla essence
- 3/4 tsp. baking powder
- 1/2 cup white sugar

Coffee Buttercream:
- 250g of unsalted butter (softened to room temp.)
- 100g icing sugar (sifted)
- 1 Tbs. milk
- 2 Tbs. hot water
- 2 1/2 tsp. of ground coffee (instant or freshly blended - whatever you have)
- 1 tsp. vanilla essence

How To:
Chocolate Roll:
1. Pre-heat oven to fan forced 180 degrees Celsius
2. Line and light grease a 30 x 40cm rectangular baking tray with some baking / parchment paper then set aside
3. Sift cocoa, baking powder and flour in a small bowl then set aside
4. Beat egg whites in a large mixing bowl until soft peaks form before adding sugar and continue beating until egg white mixture becomes glossy (approx. 3 minutes on high)
5. Beat egg yolks with milk and vanilla essence in a separate bowl
6. Fold yolk, milk, vanilla mixture into the egg white bowl

White/ yolk folding

7. Add dry mixture (flour, baking powder, cocoa) to the mixed yolk/whites bowl and fold until well combined
Cocoa/ white and yolk folding
8. Pour mixture into lined baking tray and spread evenly to all corners. Wiggle the tray lightly to ensure an even spread. Make sure not to tap the tray as you'll break the air bubbles in the egg whites which may affect the rise of the cake
9. Pop into the oven for 13 minutes
10. Sift a small amount of cocoa onto a new piece of baking paper to act as a working space for the cooked chocolate sponge
11. Flip the cooked sponge onto the new cocoa coated baking paper then carefully remove the baking paper that was used to bake the sponge in the oven
12. Using the baking paper, fold the shortest edge of the sponge and roll (yup, while it's hot / warm) and leave it in the rolled cylinder to cool completely

Kebab anyone?

Coffee Buttercream:
1. Mix coffee mix into hot/warm water until dissolved and leave until completely cooled
2. Beat softened butter on high for 5-7 minutes until the yellow butter turns to a creamy - off white colour
3. Add and mix milk and vanilla essence until well combined
4. Add sifted icing sugar and beat for 5 minutes until well incorporated, remembering to scrape the sides
5. Add coffee mixture into the buttercream and mix well
      Note: - If you find your mixture too runny, add 2x Tbs. icing sugar until you have the perfect
                   consistency
                - If you find it too stiff, add a Tbs. of milk until you have the perfect consistency
                            - Perfect - pipeable consistency is when it'll only slide of your spatula if you force it
                              back into the bowl with one swift hand movement

Assemble:
1. Un-roll your sponge
Look at those fold marks!

2. Using a piping bag, fill the inner rectangle sponge with the coffee cream

I accidentally added a bit too much cream. But it's so good, I didn't even care. You'll probably use abut 3/4 of the coffee buttercream you produce. Pop the leftovers in the fridge or freezer in a air-tight container for 2-3 weeks.
3. Spread the cream evenly, close to the edge as possible, to about a 5mm thickness


4. Using the baking paper, fold the shortest edge of the filled sponge and roll just as you had it before
5. Cut off the rough edges if you like then serve!

      I hope you enjoyed this recipe and be sure to share if you do give it a go. Dad loved his cake and asked for some slices to bring to work so he can have with his morning coffee. Coffee on coffee, why not? The beauty of this roll cake is that you can customise it to whatever flavour you want and will suit every occasion. Why not impress the family with an Easter themed roll cake? Add a couple of miniature easter eggs in the filling and they're all in for a surprise.

Here's a side view of my coffee buttercream covered two-tiered vanilla sponge cake I made last week for an early Easter party with the family. Coffee buttercream goes amazing with anything!

        Hope you're all having a lovely week!

        Nibble Away,
                 
                    Jo.

Sunday, 26 May 2013

How to: Banh Bong Lan (Vanilla Sponge Cake)

Hey Nibblers!

       On Friday, my amazing mum turned 50! She's my inspiration when it comes to cooking. She loves to experiment and always tries to perfect her recipe if she makes the tiniest mistake. She mostly cooks Vietnamese cuisine as that's our background which is great because that way, I've learnt to cook some traditional dishes myself. One of her favourite cakes is the 'Vanilla Sponge Cake' or in Vietnamese translation, 'Banh Bong Lan.' She makes it almost every other week to give to my relatives and is always telling me to learn to make it. I didn't. But, it's only because I wanted to surprise her on her birthday!

        I took it a step further and decorated the cake in one of her other favorite desserts, profiteroles (I'll be sure to post a recipe for these in the future) and had nuts covered on the side. It didn't turn out as symmetrical and neat as I wanted it to. But, the taste was all there. And, she was surprised so win-win situation. I was also time constricted as I had to rush home from work and only had 2hr 1/2min to do the 'banh bong lan' component, the icing for the nuts to stick, the custard, the melting of chocolate and profiteroles casing. My dedication to finish in time override my hunger so, I even skipped dinner.

Mum's cake with the 'Banh Bong Lan' sponge bottom
        The popularity surrounding 'Banh Bong Lanh' lies in how light and fluffy the sponge is. It's all in the technique and so, I failed with Mum's cake last night. The flavours were all there and it did rise a fair amount but, the oil in the batter did not mix in well so, it had a thick layer of thick cake when I cut the cake open. Mum said it took her a couple of tries to make it perfect but, it all comes down to technique/patience. So, since I sort of failed, I re-did it this morning with Mum's supervision but, in muffin form because it's less cooking time. The cake version has the exact same recipe just in a different tin.
        So, let's break it down and take it one step at a time.

How to: Banh Bong Lan (Vanilla Sponge Cake)

What you need: 


- 6 eggs
- 140g of white sugar (doesn't need to be caster)
- 180g of self- raising flour
- 1/2 tsp. of cream of tartar
- 1 Tbs. Vanilla extract or 1/2 Tbs. vanilla sugar
- 90ml of canola oil
- 90ml of milk
        Note: This makes one standard round cake tin, standard bundt tin or 12 large muffins
                          P.s. For muffin form, it's best to use muffin paper (cafe styled) so these babies have space to rise. You can find these papers pre-fold at local supermarkets or simply cut squares out of some baking paper and folding them to make four edges to fit in a standard muffin tin.
                  For large cake form pre-heat oven to 160 degrees celcius and bake for 45-50min
                  For muffin form pre-heat oven to 180 degrees and bake for 20min

How to: (Pictures below show this recipe but doubled in quantity as Mum wanted me to make 24 muffins)

1. Preheat oven to 180 degrees Celsius
2. Separate egg whites in a medium mixing bowl and egg yolks in another
3. Beat egg whites on high using an electric mixer for 30 seconds before adding 2/3 of the sugar into the bowl.
4. Continue to beat until egg whites for about 7 mins or until the egg peaks are able to hold their shape

Beating egg whites on high
Until they form peaks/ hold their shape


5. Add vanilla, cream of tartar, the rest of the sugar to egg yolk and beat using the same electric beater on high for about 5 mins or until mixture turns from the deep orange to a light yellow/beige colour

From bright orange yolk to yellow/ beige in colour
6. Add oil and milk into a large mixing bowl

Oil and milk in a large bowl
7. Transfer egg yolk mixture into large mixing bowl filled with oil and milk
8. Fold egg yolk mixture, oil and milk
          Note: Try and fold/ separate as much oil as you can throughout the mixture. Most of it won't disappear until you the rest of the ingredients so, don't stress
9. Add a large ladle full of the egg whites into the large mixing bowl spreading it evenly across the surface and then using a wooden spatula, fold it a couple of times

Ladle dollop of egg whites
10. Sift a thin layer of the flour into the mixture, spreading it evenly across the surface (To prevent lumps in mixture) and then folding it in a couple of times
          Note: Oil may have sunken to the bottom of the bowl so be sure to scoop and fold to make sure there's no oily bits left (it'll leave a thick layer of dough looking bit in your cake). If you see a patch of oil add some flour and keep folding/scooping the area to spread the oil. It'll take time so keep adding flour/ egg whites while taking care of those nasty oil blobs.


Using a normal sift or one like this can help your arm tire less. It also distributes even amounts of flour and allows for flour dispensing direction control
11. Repeat steps 9 and 10 until all the egg whites and flour has been well combined.
         Note: It is a long process but the end results are worth it. Be sure to fold gently to minimise the loss of air from the mixture
                  The end mixture should be the texture between say Ski yoghurt you find in supermarkets and greek yogurt sold at health food stores. The super runny bits, may indicate oil has not yet been combined well.

Mixture well combined
12. Scoop mixture in a measuring jug to make it easier to pop into muffin tins
Makes it easier to pour mixture in evenly
13. Pour mixture to the brim of muffin casings
13. Pop into pre-heated oven for 20 minutes

Beautifully risen at 16 minutes
3 minutes in


14. Let them cool for about 5 minutes and serve

They'll rise a lot in the oven but as they cool, the deflate a cm or so
Ready to eat!
Success! Light, fluffy and delicious
Happy Birthday Mum! <3
           We've just come back from Mum's birthday dinner at 'Criniti's' Darling Harbour which I'll be doing a review on soon. 'Vivid' Sydney is also in full swing at the moment so it was a great post-dinner activity. 'Vivid' is a light, music and ideas festival running from 24th of May to the 10th of June. So, if you find yourself in the city/ Circular Quay side have a look around.
       
Snap shot from Vivid Sydney
           Hope you all have an amazing week.
     
Nibble away,
         Jo x.
Related Posts Plugin for WordPress, Blogger...