Showing posts with label Recipe. Show all posts

Thursday, 17 March 2016

How To: 'Golden Gaytime' Cheesecake

Hi Nibblers!

          One of my best friends Thao celebrated her 23rd birthday a few months ago. She was overseas on her actual birthday so we had a belated celebration. Thao and I have known each other for half our lives. We had actually crossed paths at an after school tutoring class but didn't know we actually went to the same school. We were in two different classes and it was too early in the year to know anyone else in the grade. It wasn't until school had finally started and we both rocked up in our matching uniforms to the tutoring class that we were acquainted. From then, we hung out together at school together during breaks and have been trucking along since.
           What I love about our friendship apart from all the giggles we have is our love for food. Thao has been a lover of cheesecake for as long as I can remember. Unfortunately for me, cheesecake hasn't been on the top of my list. I do understand the cheesecake hype though. Crunchy biscuit base, smooth velvet centre with a zesty kick, who couldn't fall in love with it? However, after years of being in denial and peering over at Thao when she's had a cheesecake in hand has converted me. So, in celebration of our friendship and to honour her love of cheesecake I surprised her with one for her birthday. By now you Nibblers know that I love to experiment so, I decided to combine an Aussie classic dessert 'The Golden Gaytime' (also one of Thao's favourites) and cheesecake together. This recipe turned out exactly how I envisioned and luckily for me, it was a hit with her! I'm so happy with how this turned out and now you guys can give it a go too.

How To: 'Golden Gaytime' Cheesecake


Makes one 20cm x 20cm cheesecake
What you'll need:
Base:
- 75g unsalted butter (melted)
- 100g biscuits (I just used a simple digestive biscuit)
- 150g honeycomb chocolate bars (I used Crunchie bars)
Filling:
- 300mL thickened full cream
- 3 Tbs. white sugar
- 250g cream cheese
- 1 tsp. vanilla
- 1/2 tsp. lemon juice
- 50g Jersey caramels
- 2 Tbs. milk
Topping:
- 1/4 cup of granulated peanuts (roasted)

How To:
Base:
1. Place crushed biscuits and honeycomb into a sealed bag or food processor and crush until it roughly resembles bread crumbs
2. Add melted butter to mix and combine until well coated
3. Place buttery biscuit mix into cake tin and evenly spread across base of tin and sides to form a cup well for filling to go into later - use a cup to help press down on biscuit mix for a more even look then place in fridge to set or until needed
Filling:
1. Pop caramels and milk into a heat proof bowl and melt caramels until smooth (either quick pulses at 30 seconds each time in the microwave - stirring in between or a double boiler method) then set aside to cool
2. Beat thickened cream and sugar until firm stiff peaks form then set aside
3. In a seperate bowl, beat vanilla, lemon juice and cream cheese until well combined
4. Fold thickened cream and cream cheese until well mixed
5. Place filling mixture into tin and smooth around to the edges

6. Spoon small amounts of caramel sauce around the cream cheese/cream and then using a skewer, swirl around to create a marble effect
7. Sprinkle roasted granulated nuts over cheesecake the place cheesecake to set for at least 4 hours before serving!

             This recipe was so simple to make and definitely a crowd pleaser. With a lovely honey combed biscuit base, zesty cheese filling with hints of caramel goodness and a peanut crunch on top it certainly sounds like every 'Golden Gaytime' I've ever eaten. I hope you enjoyed this recipe! If you do give it a go, be sure to comment below.

Nibble Away,

                    Jo


Sunday, 10 May 2015

How To: Bánh Bột Lọc (Vietnamese Clear Pork and Shrimp Dumplings)

Hi Nibblers!

            I am so excited to be sharing this recipe with you! It's one of my all time favourite Vietnamese dishes and one I crave with the strongest intensity. I had one of my urges for Bánh Bột Lọc recently when my parents were away on holidays which meant I was in charge of all things to do with food. My tummy was grumbling. I started researching. I started looking at pictures. I couldn't take it anymore. The lust was just too much. I woke up the next day, gathered the ingredients from the shop and away I went. It was the best decision I ever made. They tasted exactly like I wanted them to and it was super easy to do. I made Mum a dish as soon as she came from the airport and now she can't stop asking for it. And with Mother's Day today, this is the perfect recipe to celebrate.

How To: Bánh Bột Lọc (Vietnamese Clear Pork and Shrimp Dumplings)


Yields approx. 50 dumplings
What you'll need:
Shrimp and Pork ready to go!

For the filling

- 500g diced pork shoulder
- 500g shrimp, shell left on (head and tail cut off)
- 1 1/2 Tbs. cooking caramel (creates a nicer golden brown colour)
- 4 Tbs. brown sugar
- 4 Tbs. fish sauce
- 2 Tbs. oil
For dumpling dough (adapted from 'The Spices of Life' blog - Her blog really helped me with this recipe)
- 400g tapioca starch
- 2 Tbs. oil
- 315 mL boiling water or 1 and 1/4 cup
- 1 tsp. salt
P.S I didn't dice my pork finely
enough! Cut it small so it's
easier to fill
For spring onion/scallion oil
- 10 sprigs of scallion/spring onion finely sliced
- 1/2 canola oil
For fish sauce dipping sauce
- 1 cup of fish sauce
- 1L of water
- 260g sugar

How To:
Start with the fish sauce:
1. Mix sugar, fish sauce and water in a saucepan on low to medium heat until boil and well combined
2. Remove from heat and set aside until needed
Make the filing:
1. Heat oil and sugar on medium to high heat, constantly stirring to create a caramel sauce
Before the sugar caramelises
2. Add diced pork and shrimp and stir to evenly distribute heat
3. Add fish sauce and stir until well combined
4. Reduce heat to low and let simmer for 20 minutes, stirring occasionally then set aside until needed
For scallion oil:
Scallion Oil
1. Heat oil in a frypan on medium to high heat for about 2 minutes until evenly heated
2. Add scallion to oil and stir until coated through then set aside
For the dumpling dough:
1. Mix tapioca starch, water, oil and salt and knead in bowl until dough comes away from the bowl and no longer sticks to sides of the bowl
2. Divide the batter into 8 equal parts and place 7 in a bag or lidded container to stop the dough from drying out
3. Roll dough into a log shape with a diameter of 2 cm
Caramelised sugar
4. Cut log into even 2cm x 2cm logs and place into bag or lidded container to stop dough from drying
5. Repeat steps 3 and 4 until all dough is cut
6. Taking a small log, roll out until you have a circle with a diameter of approximately 5cm and thickness of 3mm
7. Add about a tsp. of pork and shrimp filling to centre of the circle
8.  Fold edges together and firmly press to create a semi circle shape then set aside in bag or lidded container until needed
9. Repeat steps 6 - 8 until all dough is used up
         Note:  If you have any left over filling, it'll go perfectly with a bed of rice
                    Dumplings can be frozen until needed so if you know you will be short on time but have a party coming up, this is the perfect recipe. No need to thaw them before you cook them. All other components (fish sauce and scallion oil can also be frozen until needed)

Dumpling log

Fill them up 
Dumpling thickness
Assemble time:
1. When you're ready to cook dumplings, fill a bowl with cold water ready for cooked dumplings to bathe in before garnishing (This will stop the dough from hardening)
2. Fill a pot with water and leave on high heat until water boils
3. Reduce heat to low and add desired raw dumplings
4. Cook dumplings for about 5 minutes in which dumplings will start to float to the top of pot or until dumplings become transparent and soft
5. Scoop cooked dumplings using a strainer and place into cold water for 30 seconds
6. Place dumplings into a bowl and add a few Tbs. of scallion oil and toss until well coated
Ready to be bathed!
In the bath
7. Add desired fish sauce and add some chilli slices and/or fried onions to garnish and consume!

           This recipe may seem a tad overwhelming with the number of components and steps but I can assure you, it's all worth the effort. They're delicious and can definitely please a crowd. It'll also make you think twice about wanting to buy these in the shop because you can make a whole bunch of dumplings for a fraction of the price!
   
                I hope you all enjoyed this recipe and had a lovely Mother's day with your Mum / family! Leave a comment below if you give this one a go or if you have any other questions.

Nibble Away,
              Jo

Thursday, 25 December 2014

How To: Strawberries and Cream Crepes

Merry Christmas Nibblers!

         Christmas is here and to celebrate, I wanted to share my 'Strawberries and Cream Crepes.' These are so easy to make and will please any crowd. If you're busy you can just make all the components in advanced, pop it all in the fridge a day ahead and assemble them the day of your occasion. Perfect for this festive season!

How To: Strawberry and Cream Crepes


What you'll need:
Makes 6-7 Crepes/Pancakes (23cm in diameter)
- 50g plain flour

- 2 Tbs. of caster sugar
- 2 Tbs. vegetable oil

- 3 eggs
- 1 drop of pink food colouring 
- 1/2 tsp. vanilla essence
- 1/2 cup of milk (125ml)

The Filling:
- 1 punnet of Strawberries sliced into approx. 5mm wide slices(250g)
- 150g thickened cream (heavy cream)
- 1 Tbs. caster sugar
- 1tsp. vanilla essence

How To: 

Crepe batter Preparation:
1. Beat eggs, sugar, food dye, oil, vanilla essence and milk until well combined
2. Add flour and stir until incorporated
3. Sieve the crepe/pancake batter through a sift into a new bowl to rid of the lumps
4. Cover the batter mixture and leave at room temperature for 30-60 minutes

The Filling: Attend to filling component now while waiting
5. Fill a large bowl with water and ice to make an ice bath (To ensure the cream doesn't split)
6. Pop a small mixing bowl into the ice bath and add cream, sugar and vanilla then whisk until hard (about 5 minutes) then set in fridge until needed
Crepes/Pancake component
8. Lightly spray frypan (If it's a non-stick fry pan, you won't need to oil it)
9. Heat frypan on low heat
10. Using  a small ladle or 1/4 cup, mix the crepe batter and then add into the middle of the fry pan
11. Swirl the batter around the pan to the edges
12. Cover the frypan and leave for approx. 1.5 - 2 minutes or until lightly brown around the edges
13. Slide the crepe/ pancake onto a plate and repeat until the batter is finished

14. Cover the crepes/ pancake with some cling film and leave in the fridge to cool for approx. 30 minutes
15. Construct pancake - a dollop of cream in the middle of the crepe, 3-4 strawberry slices on top and then fold in the sides and fold.


          I hope you're all having a lovely Christmas! I'm so happy with the recipes I've been able to put out during this festive period despite being so busy with work. May you all have an amazing day and enjoy with your friends and family. Hope you enjoyed this recipe!


Much love,
       Merry Christmas!

                      Jo

Saturday, 25 October 2014

How To: Maltesers Cupcakes

Hey Nibblers!


            I've been wanting to put this recipe up for so long! With university nearing its end, time has just been slipping out of my fingers. Three more weeks and I'll have to start fending for myself in the real world!
            This has been my go-to recipe lately. It's easy and doesn't require any sort piping skill. I'm also loving the feedback that they're receiving from my family and friends. Even Kevin who isn't keen on sweets, gives it the tick of approval. So with the festive season coming up, this just might be the recipe for you.

Maltesers Cupcakes
Yields 12-14 medium cupcakes


What you will need: Cupcake base
- 1 cup or 180g self-raising flour (plain flour will work just add a pinch of salt)
- 2 tsp. of baking powder
- 1/2 cup or 80g of cocoa powder
- 50g butter (softened to room temperature)
- 3/4 cup or 150g of sugar
- 2 eggs
- 1 cup or 250ml of milk
- 3/4 tsp.  of vanilla essence
Maltesers Buttercream:
- 400g Maltesers Chocolate (For decoration/buttercream purposes oh and for snacking in between!)
- 250g of unsalted butter (softened to room temperature)
- 100g icing sugar (sifted)
- 2 Tbs. of milk
- 2 tsp. of vanilla essence 

How To: Cupcake Base
Malteser Cupcake base - Surprise crunch!
1. Pre-heat oven to 180 degrees Celcius or 360 degrees Farenheit (fan-forced preferably)

2. Line tin with cupcake patty pans
3. Sift together flour, baking powder and cocoa in a medium mixing bowl then set aside
4. Beat together the softened butter and white sugar in a large mixing bowl until well combined and fluffy (approx. 3 minutes)
5. Add eggs in one at a time and mix into butter/sugar component 
6. Add vanilla essence to wet ingredients and mix
7. Add 1/2 of the dry ingredients and 1/2 of the milk into the wet mixture and mix
8. Repeat step 7 until all ingredients are all combined
9. Spoon about 3 Tbs. of the cupcake mixture evenly into each of the lined patty pans about 1/2 - 3/4 way up
10. Add  3 x Maltesers into each patty pan 
11. Pop into the oven for about 15-18 minutes checking with a skewer at the end to see if it's cooked (depending on your oven - I checked mine at 15 minutes and they were cooked)
12. Rest the cupcakes for 15-20 minutes before popping the Maltesers cream on


How To: Maltesers Buttercream
Crushed Maltesers 
1. Crush about 200g of the Maltesers Chocolates into chunky pieces then set aside (I used a bowl and pestle but, a food processor or using a knife and cutting the chocolates into rough 1/4 pieces would work)
2. Beat softened butter on high for 5-7 minutes until the yellow butter turns to a creamy - off white colour
3. Add and mix milk and vanilla essence until well combined
4. Add sifted icing sugar and beat for 5 minutes until well incorporated

5. Mix crushed Maltesers into the buttercream
6. Spread the Maltesers cream onto cupcakes (I just used a butter knife and spread about 1-2 Tbs. on each cupcake)
7. Pop 1 x Malteser onto the centre of each cupcake and nibble away!

           Let me know if you give this lovely recipe a go. I'm always on Instagram so if you ever wanted to share a recipe or picture just tag me @nibblejo_x. These cupcakes are great for their simplicity and the crunchy Maltesers cream with the moist chocolate cupcake base is heaven. Hope you enjoyed this post!


Nibble Away,
          Jo

Thursday, 23 January 2014

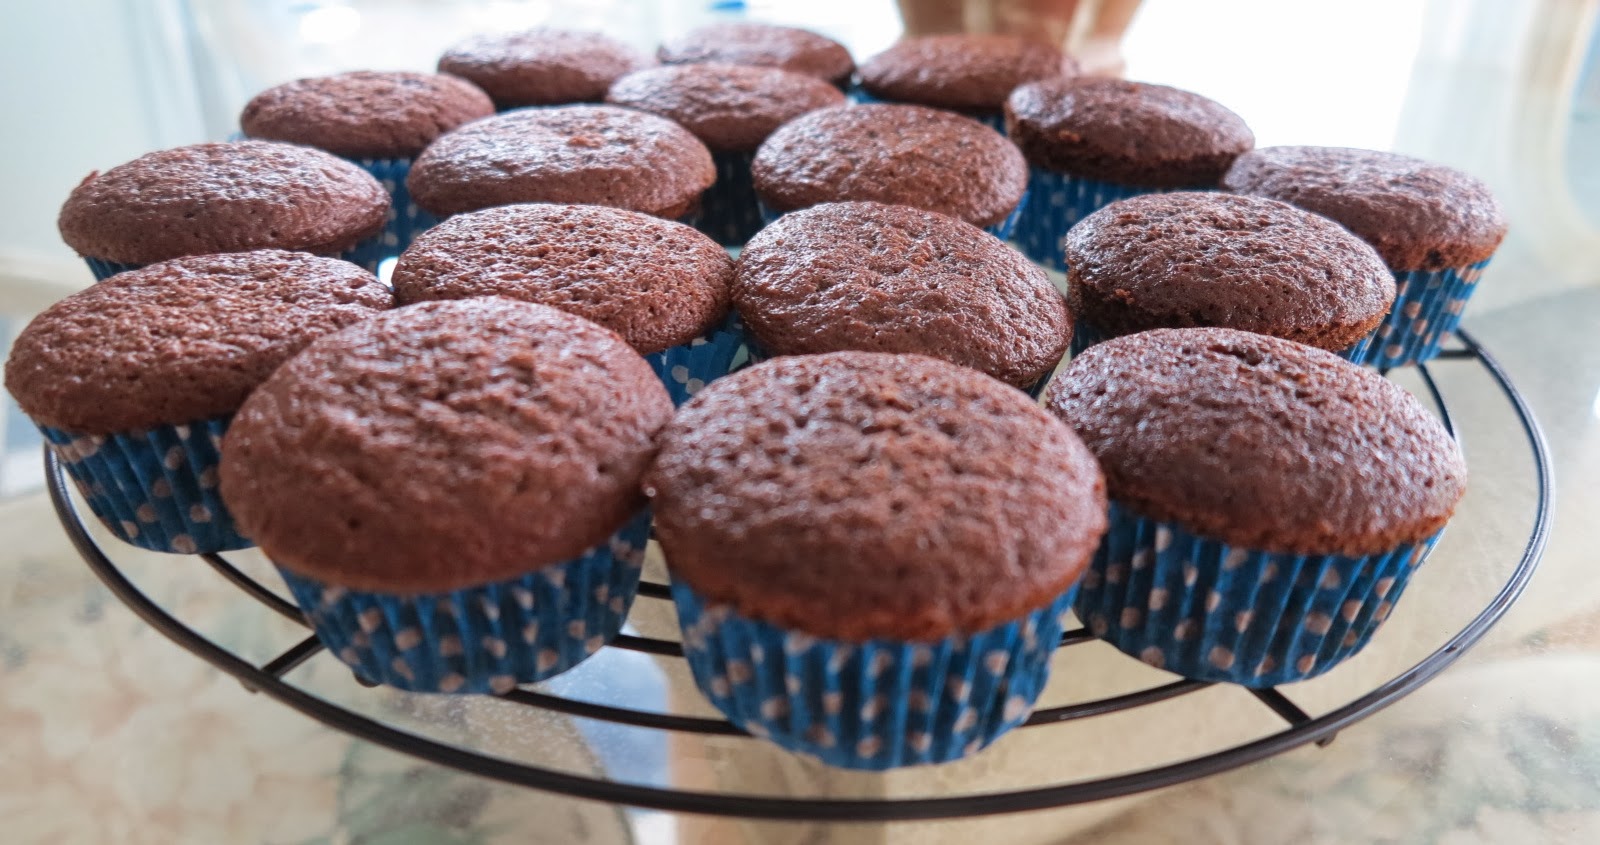
How to: Choco-Cat Cupcakes with Peanut Butter frosting

Hey Nibblers!

         If you can't already tell by the title this is going to be one CAT-riffic post! To be quite honest, I'm actually not a cat person. In fact, I'm not really an animal person. It's not because I dislike animals, it's just I've never been around them enough to not be afraid of them. I blame my Mum though. She uses me as a human shield when a dog walks nearby. I think that's where my fear emulated from. 
         So why dedicate a recipe to cats you ask? It's all in the name of friendship. My amazing nursing buddy Therese is turning 21 in a couple days time. She's a total cat-lover. While I would have loved to buy her a cat, I can't afford the expenses. So, I went for the next best option I could think of. Choco-CAT Cupcakes. Want to know how I made them? Just keep reading.

What you'll need:
Makes approx. 15 medium sized cupcakes


- 170g of plain flour
- pinch of salt
- 2 tsp. baking powder
- 2 eggs
- 3/4 cup of cocoa 
- 50g unsalted butter (softened to room temperature)
- 1 cup of white sugar
- 1 cup of milk
- 3/4 tsp. Vanilla Essence

Fluffy Butter and Sugar Mix
How to: Choco-cat Cupcake component

1. Pre-heat oven to 180 degrees Celcius
2. Line tin with cupcake paper
3. Sift together flour, salt, baking soda, baking powder and cocoa in a medium mixing bowl
4. Beat together the softened butter, vanilla essence and white sugar using hand mixer in a large mixing bowl until well combined and fluffy (approx. 3 minutes)
5. Add eggs in one at a time until mixed
6. Add 1/3 of the dry ingredients into the butter/sugar mixture and hand mix until well combined
Cupcake batter
7. Add 1/3 of the milk and mix until well incorporated. Remember to scrape the sides of the bowl
8. Repeat steps 5 & 6 until all ingredients are all combined
9. Spoon cupcake mixture evenly and 3/4 of the way up 
10. Pop into the oven for 18 minutes checking with a skewer at the end to see if it's cooked
11. Rest the cakes for 5-10 minutes before consumption


Peanut Butter frosting
White butter compared to peanut butter
- 250g of unsalted butter (softened to room temperature)
- 150g of sifted icing sugar
- 3 tsp. Vanilla Essence
- 2 Tbs. of milk
- 2/3 cups of smooth peanut butter

How To:
1. Using a hand-mixer, beat the softened butter for 5 minutes.
           (The butter should change from a yellow to off-white colour)
2. Add 1/2 of the sifted icing sugar, continuously mixing until well combined
3. Add milk & Vanilla and mix 
4. Add remaining icing sugar and mix until well combined remembering to scrape the sides of the bowl. Mix for another 3 minutes
5. Mix in the peanut butter until well incorporated 
             The frosting should now be ready. It should stay on your spatula unless you force it down yourself.
                 Note:  If the frosting is too sloppy, add more icing sugar. If your frosting is too dense, add a Tbs. of milk.
                             If you have leftover buttercream frosting, don't worry! You can pop it into the fridge for 3-5 days in an                                  airtight container or up to 3 months in the freezer.

Assemble Cats!
1. Pipe two arrows about 1cm from the edge for the Cat ears
2. Two dots for eyes
3. A small 1-2cm line from the half way point of the cupcake for the nose bridge with two minor arcs to form the nostrils
4. Add three whiskers to the left and right sides of the Cat's cheeks
5. Outline the cupcake for definition and voila! You're finished

Happy 21st Birthday Tree <3

        I hope you all loved this fun Choco-Cat Cupcake post! These turned out to be deliciously moist and were great the day after. The peanut butter frosting added an extra boost to the flavour and is so easy to make. If you do give these a go, leave a comment below or share your masterpieces on instagram/ twitter and tag @nibble_jox so I can see them.
        Hope you all have an amazing day and week.

Meow!
Nibble Away,

            Jo.

Friday, 22 November 2013

How To: Starburst Cupcakes with Peanut Butter Frosting

Hey Nibblers!

     I have literally just finished my last uni exam for this year. I'm peering outside my window and all I see is rain. Usually, this upsets me but, I've feeling quite calm from the pattering sounds hitting my window. Thunder and lighting are going at it with each other but for some reason I'm in such a festive mood. I love christmas. It's just the frantic present hunting trips, crazy parking queues and mountains of food that have me chirping for days. To celebrate my elevated spirits, I thought I would share with you something a little bit quirky. I've never seen a recipe like it before so I hope I've just created something special you could try out for the coming festive season.
     I can't take all the credit for this little invention of mine. It started about seven years ago when my food tech assignment was to bake a cupcake with any topping we wanted. Everyone opted for the normal options of either choc chips, fruits and veggies. I on the other hand forgot to even bring anything from home. So, I quickly called Kelly (as she loved close by) and asked her if she had anything at home. She only had Starburst gummy lollies and as to not be in trouble, I said yes. They turned out to be amazing! The gummy bits basically just melt into colourful puddles of sugar in the cupcake but, it's really quite delicious. I can't explain it well but it's like eating lollies and cake all in one go. It sounds weird but it works. Now, seven years on, I've decided to re-create that and put an extra twist on the original creation and add some peanut butter frosting. Hope you enjoy!


What you'll need: (Makes 12 large cupcakes)
For the cupcakes:

- 3 eggs
- 1 1/2 cups self-raising flour
- 3/4 cup white sugar
- 1 tsp. vanilla extract
- 1 1/2 tsp. baking powder
- 1/3 cup of milk
- 3/4 cup of Starburst Jelly Babies
(OR your favourite gummy lollies, just roughly cut them into 1x1cm chucks to avoid the cupcake breaking when cooled.)
- 180g of melted unsalted butter

For the peanut butter frosting (optional):
I've just discovered Elise's Youtube channel, 'MyCupcakeAddition' where she makes the most awesome cupcakes, cakes and cake pops and does an awesome job of decorating them.
 I used her 'Buttercream Frosting' recipe and added 2 heaped Tbs. of smooth peanut butter to make the peanut butter flavouring as she does in her  'Giant Reese's Butter Cup Cake' recipe. You should definitely click on the links to check her out!

How to:
1. Preheat your oven to 180 degrees Celsius (356 degrees Fahrenheit)
2. Line or spray your cupcake tray to prepare for cupcake mixture
3. Beat your melted butter, vanilla and eggs in a mixing bowl then set aside
4. Measure out your flour, sugar, baking powder into a large mixing bowl and mix well together
5. Fold your wet mixture (egg, butter, vanilla) into your dry ingredients bowl combine until well incorporated
6. Mix in your milk and Starburst Jelly babies until well combined
7. Divide equally into lined cupcake tray
8. Pop them into the oven for 18 minutes, checking with a wooden skewer to see if it's cooked
9. Prepare your peanut butter frosting in the meantime using Elise's recipe linked above

10. Take the cupcakes out of the oven and them to cool for about 10 minutes
11. Cut your cupcakes horizontally into equal pieces as if you were making a sandwich
12. Spoon in a generous amount of frosting onto one side and pop the other half on top
13. Nibble away!

      Hope you Nibblers enjoyed this recipe! Just looking at these pictures has made me even more excited! If you want to make these especially festive, just use only red and green gummy lollies! They will taste just as awesome. They do also keep up to a week and a bit if you refrigerate them. Just microwave them for about 20 seconds (depending on your microwave) and they come out as good as if they've just been baked. On that note, I think it's time to put the Christmas tree up! When do you start putting those festive decorations up? I always do it the day I finish my exams. 
      If you do try this recipe out or have any other thoughts, tweet me or leave a comment below! All my contact info in in the 'About Me' tab. Hope you're all having an amazing week. Here's a few more shots of the finished product.

oh peanut butter frostingggg 


Nibble Away!
          
             Jo x. 

Friday, 8 November 2013

How to: Banana Cupcakes

Hey Nibblers!

         I know I've already posted a banana cake recipe but since then, I've started experimenting and after three successful attempts, I just had to share it with you all. It's such a quick recipe that doesn't take much of your time. It's moist and stays light and fluffy the next day. Even if you refrigerate them, just pop them into the microwave for about 30 seconds (depending on how strong your microwave is) and they'll be as amazing as if you just baked them!
          My Mum is one of my hardest critics but she is also one of my biggest inspirations. She's also a lover of bananas. This recipe has her nod of approval and with that, let's get into this.


What you'll need: (With this recipe, I make about 12 large cupcakes)
       - For the cupcake version bake for 18-20 minutes. Check them using the skewer insertion method
         - For a large cake version bake for 40-45 minutes.


- 1 1/2 cups of self-raising flour
- 1/2 cup of brown sugar
        Add 3/4 cup if you love that extra sugar kick.
- 4 small to medium ripe bananas
- 1 1/2 tsp. of baking powder
- 1 Tbs. cinnamon spice
- 1/3 cup of milk
- 3 eggs
- 180g melted unsalted butter

How to:
1. Pre-heat oven to 180 degrees Celsius (356 degrees Fahrenheit)
2. Line your cupcake tin with baking paper or grease your tin well
3. Mash your bananas until well combined. Large 1cm chunks of banana is fine


4. Whisk your melted butter, milk and eggs in a medium sized mixing bowl until well combined
5. Add your mashed bananas to your whisked wet ingredients and mix until well combined
6. Combine your self-raising flour, cinnamon, sugar and baking powder and mix together so it looks like a dry marinade mix


7. Fold your dry and wet ingredients together until you can't see anymore flour through the mixture or stuck on the side of the bowls


8. Fill your cupcake tin moulds, dividing it into equals amounts
          (I filled mine about 3/4 of the way up)


9. Pop your tin into the oven for 18-20 minutes
10. Rest these babies cool down (if you can) for 5 minutes before devouring
         (They won't stick to the cupcake paper if you let them rest!)


        Hope you give this recipe a try. If you do, be sure to leave a comment! I'll be happy to answer any questions and be happy to try any requests of yours. Hope you're all having a great week.

Nibble away,

                   Jo x.
Related Posts Plugin for WordPress, Blogger...