Showing posts with label Countdown To Christmas. Show all posts

Thursday, 24 December 2015

How To: Christmas Tree Profiteroles

Hi Nibblers!

     I love the Christmas season. It's my favourite time of year but it goes by in a blink of an eye. It's always buzzing and Christmas movies are always so heart warming. It eases all the stresses of everyday life even if it's just for a moment. I do have to admit, Sydney's Christmas are a tad too hot for my liking but it does mean I'm able to enjoy lovely potato salads and seafood all day. It also means being able to enjoy those cold desserts and not suffering from frost bitten fingers afterwards!
      The inspiration for this recipe stemmed from my love for profiteroles and Christmas! Back before I was into baking my own sweet treats, Kevin used to rush off to the local supermarket and buy me a box of custard filled profiteroles. It was always one of the best surprises back in high school. To this day, I still have such fond memories of those occasions so I decided to honour that memory with a recipe.

How To: Christmas Tree Profiteroles
Makes approx. 40 medium sized profiteroles

What you'll need:
For choux pastry
- 250mL water
- 100g unsalted butter (diced)
- 1 pinch of salt
- 125g all purpose flour
- 4 eggs
For filling / decorating
- 600mL thickened cream - setting aside 1/2 cup for ganache
- 4 Tbs. sugar
- 1/2 cup white chocolate chip buttons
- 1/2 tsp. Pandan paste OR 2 drops green food colouring (for colour purposes)
- Sprinkles to decorate (whatever you fancy)

How To:
The Choux Pastry
1. Pre-heat oven to 210 degrees Celcius or 410 degrees Farenheit
2. Place cold water and unsalted butter into a saucepan and mix until a gentle simmer
2. Add salt and flour and beat until it forms a paste / smooth dough that comes away from the sides of the pan
3. Remove pan from heat and beat egg one at a time and mix well - this takes a bit of arm power and patience - don't add all eggs at once
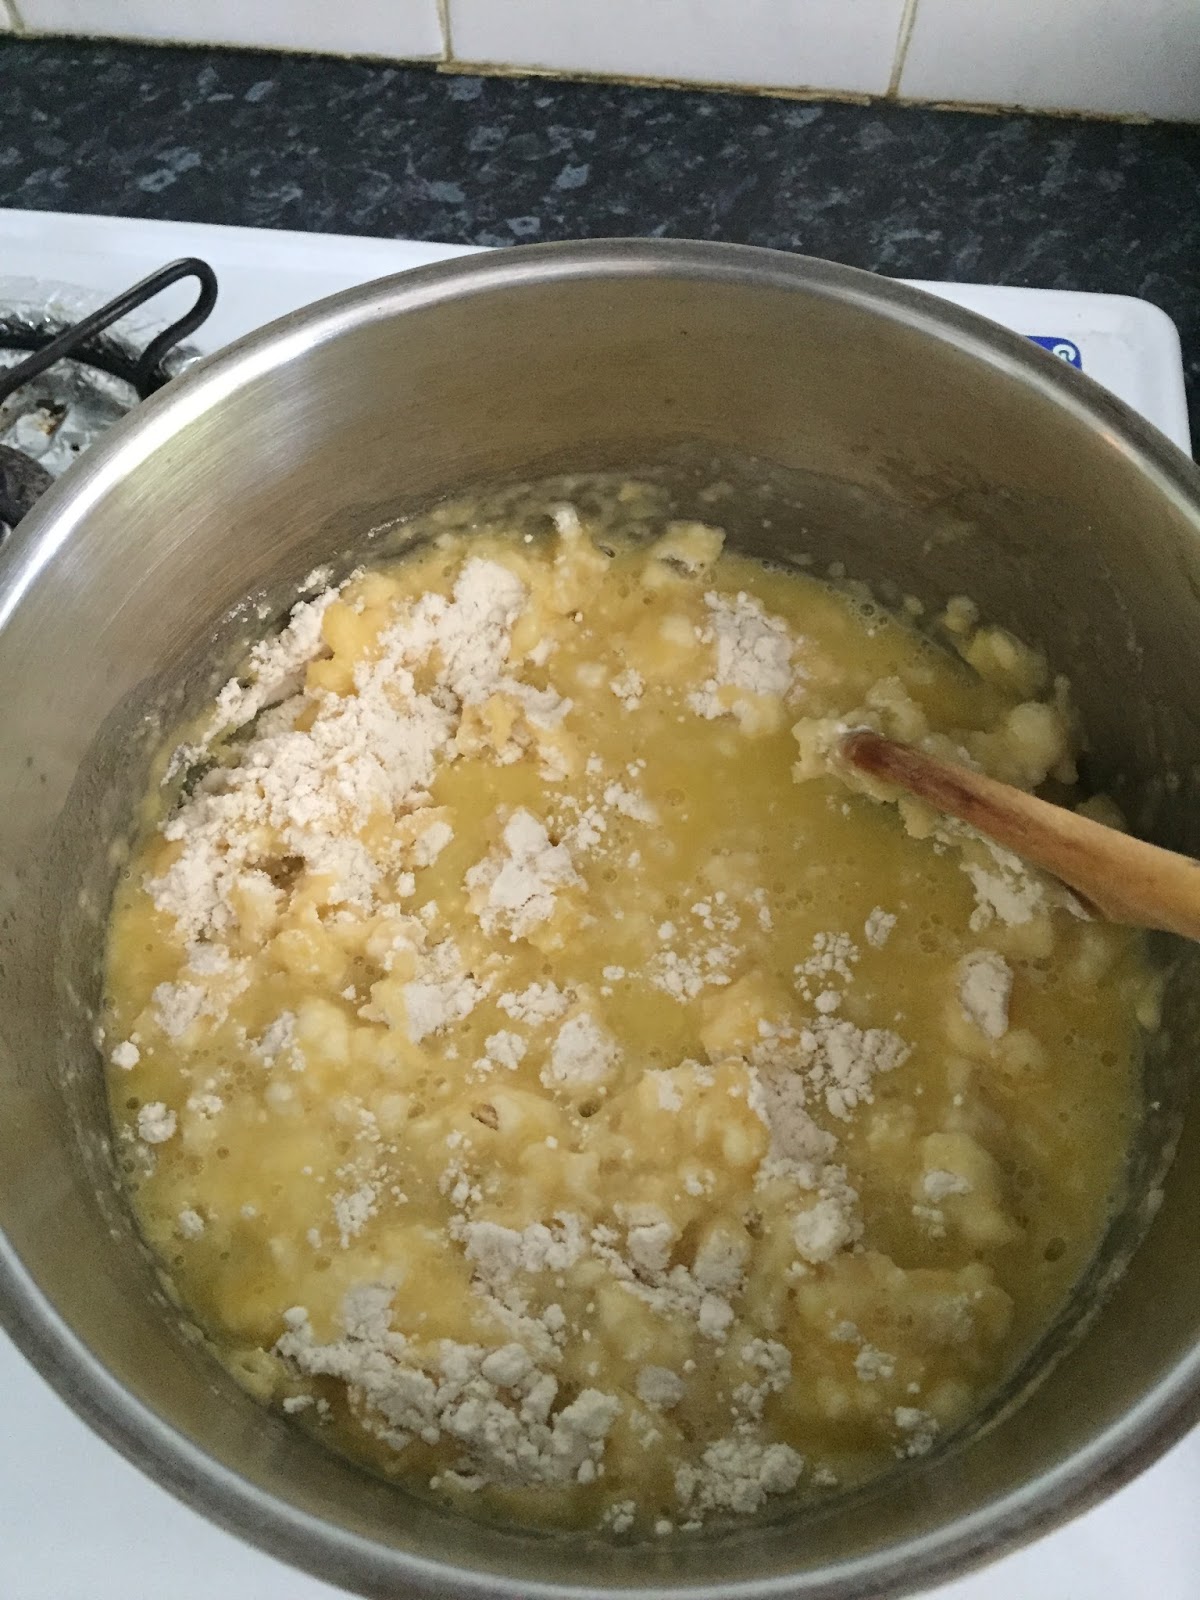
4. Pop choux pastry into a piping bag and squeeze into equal rounds on a baking sheet tray - approximately 3cm in diameter
5. Use a damp finger to push down on any spikes to ensure those spikes don't burn on the oven
6. Pop choux pastry in the oven for at least 15 minutes or until puffed and golden then set aside on cooling rack to cool
The Filling
1. While profiteroles are cooling, whip thickened cream with sugar until stiff peaks form then set aside in fridge until needed
The Coating

1. Place 1/2 cup of thickened cream and white chocolate buttons into a microwave save bowl and microwave at 1 minute intervals (stirring in between) until ganache forms a smooth velvety past - Takes about 3 minutes

2. Add pandan paste or food colouring to ganache and mix until well incorporated then set aside until needed
Assemble!
1. Poke a hole in each of the profiteroles bottoms and pipe whipped cream into the centre - stopping when you feel some resistance
2. Dip the filled profiteroles into ganache then set aside to set

3. Once all profiteroles are filled, assemble a circular base for the tree and work upwards to form a christmas tree and voila! Christmas centre piece made easy - I added my own self-drawn star to add height but you can do whatever you please.
4. Add some sprinkles and you're set!


        I hope you all have a Merry Christmas! I do have to apologise from the lack of posts this Christmas but the truth is, it hasn't been the best end to the year. A few things have come up that I have no control over which has taken all my free time that I would otherwise dedicate to this blog. But, enough of the pity party - Christmas is still exciting and if you Nibblers do try out this recipe, let me know how it goes in the comment below!


Nibble Away,
           Jo

Sunday, 6 December 2015

How To: Lindt Lindor Peppermint Stuffed Red Velvet Cookies

Hi Nibblers!

        It's December! When I hear people say how quickly the year goes by, I didn't feel it much. But ever since leaving uni and working full-time, the year goes by at lightning speed. The festive season is definitely more stressful in adulthood because I can't seem to find a time where shops are open when I'm off work. Luckily, I had a few hours on hand and headed to the shops to window shop for present ideas. I stumbled upon 'Lindt Lindor Peppermint - Christmas Edition' truffles. I had been wanting to do a mint related recipe for a while but couldn't find the oomph I was looking for until now. I quickly popped back home and started baking. Keep reading ahead to find out how!

How To: Lindt Lindor Peppermint Stuffed Red Velvet Cookies
Makes: Approximately 20 cookies 


What you'll need:
- 250g unsalted butter (softened to room temperature)
- 400g plain flour - all purpose
- 4 tsp. vanilla essence
- 40g cocoa
- 2 tsp. baking soda
- 2 Tbs. milk
- 2 eggs
- 2 tsp. red food colouring
- 180g brown sugar
- 1/2 cup white chocolate chips
- 250g of Lindt Lindor Peppermint
Optional: For decoration
- Handful green sprinkles
- 3 large candy canes - roughly chopped

How To:
1. Beat butter until smooth and creamy
2. Add white and brown sugar and beat until well incorporated
3. Add vanilla, eggs, milk and red food colouring
4. Mix in baking soda, flour and cocoa
5. Add choc chips and stir until mixed
6. Pop cookie dough into the fridge for at least an 1/2 hour
        Note:  This step is essential if you want soft,  pillowy, risen cookies. It allows the cookie dough more pliable and less sticky

7. Pre-heat oven to 180 degrees Celcius or 350 degrees Farenheit
8. Remove all Lindt Lindor Peppermints from their wrappers then set aside
9. Roll a heaped Tbs. of cookie dough into a ball before flattening it out in the palm of your hand to form a pancake shape then place Lindor in the centre dough before covering the whole Lindor truffle with cookie batter
10. Place onto lined baking tray about 5cm apart from one another
11. Pop into the oven for 11-12 minutes
11. Take cookies out of the oven then lightly press down on each cookie 
12. Decorate cookies with sprinkles and crushed candy canes 
13. Allow cookies to cool on baking tray for 5 minutes before transferring to cooling rack then devour!
        Note:  Store cookies in an airtight container for up to 7 days. Cookie dough and cookies can be frozen for up to 2 months and thawed (for eating) or baked frozen (but need an extra 2 minutes in the oven)


          This recipe is definitely for those choc mint lovers out there. The cookies are crunchy on the inside and chewy soft in the centre. The crushed candy canes are a surprise crunch which I really like. These are so easy to make and taste great even without the Lindor centres. Leave a comment below if you give this a try :)


Nibble Away,
         
               Jo

Thursday, 18 December 2014

How To: Meat Pastry Shell Pies

Hi Nibblers!

        Whenever I come home from overseas, the first thing I crave is a good old Aussie meat pie. That shortcut pastry at the base, simple beef mince filling and flaky puff pastry on top is the best. What's better is the comfort of a home-made pie and having the house smelling of baking goodness. The weather has been miserable in Sydney at the moment. It's raining and has been storming constantly. So, I decided to make my own little version of the classic meat pie to enjoy. This version is best enjoyed at the table as it can be difficult to handle. But, trust me, the cutlery use is worth it because they taste amazing. Crunchy pastry shell with saucy minced beef filling, being fancy on a budget. Hope you enjoy this #CountdownToChristmas Recipe!

How To: Meat Pastry Shell Pies


Yields 10 large pies and 12 mini pies
What you'll need:
- 6 ready made puff pastry sheets
- 500g of minced beef
- 1 Tbs mixed herbs
- 2 Tbs. cornflour with 1 TBs. water to form a paste
- 1 tsp. salt
- 2 medium sized onions (diced)
- 250mL beef stock
- 70mL of thickened cream
- 3 eggs separated into yolk (egg wash) / white
- 2 Tbs. curry powder (optional - if you want a twist on your pies. It tastes amazing)
- Circle cookie cutters (Doesn't matter what size as long as one of the circle cutters is larger than the other. I used a large lid from my peanut butter jar)

How To:
Don't chuck the left over pastry,
mould it into something new
1. Cook diced onions in a large saucepan on a medium heat until light brown
2. Add minced meat to saucepan and keep stirring to separate the mince and cook for about 5 minutes or until brown
3. Add stock, salt, cream, egg whites, herbs and stir until well incorporated
       Note: If you would like curry flavoured mince, add curry powder to mince and stir until well combined. I did half a traditional mince and half curry filling
4. Add cornflour paste to saucepan and wait until meat boils then, reduce heat to low and let simmer for 20 minutes until think and leave to cool.
Pastry Shells ready to go!
The pastry shell recipe was inspired by Food Wishes Recipe Video. Click the link to see how Chef John made his pastry shells. I found it messier to egg wash the whole pastry sheet so, decided to only egg wash after cutting out the shapes.
5. Pre-heat oven to 200 degrees Celcius or 400 degrees Farenheit
6. For each pastry shell, cut two larger circles and one smaller circle from puff pastry sheet
7. Place one of the large circles cut outs on a lined baking tray, brush with egg wash, then place`another large circle cut out directly on top of the first cut out. Brush again with egg wash then place the smaller circular cut out in the centre of the first two stacked cut outs. Brush again with egg wash to ensure a perfect golden brown.
8. Repeat steps 7-8 until you've used all puff pastry sheets (should produce 10 pastry shells)
I did half curry and traditional mince
9. Place pastry shells into oven for 20-25 minutes or until brown then leave to cool
10. Reduce oven temperature to 180 degrees Celcius or 350 degrees Farenheit
11. With remaining puff pastry scraps from cut out, mould together into a ball and roll into a log about 30cm long
12. Divide log into 12 equal pieces and using your fingers (or rolling pin) stretch pastry until it fits into a greased 12 mould muffin tin
13. Place about 1 and a half Tbs. of mince filling into each mould
14. Brush egg wash onto the corners of each pastry mould and pop into the oven for 20 minutes or until golden brown
15. Reheat remaining mince in saucepan until warmed evenly through
16. Cut a lid for each pastry shell then spoon in minced filling (Fits about 4 Tbs. in each pie) then enjoy!
Pastry Shells cooling
Cut the top to make a lid
Then fill it with mince

           It may look a tad complicated in words but trust me, it's super easy! They taste great on their own or with a it of sauce. I couldn't help consuming a few of these pies after I had finished taking photos of them. Unfortunately, I had forgotten to take pictures of the mini pies but, if you head to my 'Mini Quiche' recipe, they turned out quite similar visually.
           The larger pies are best eaten as soon as they're made so you can make the shells in advanced, but don't fill them until you want to eat them. As for the mini pies, I left mine in the fridge and reheated them for a quick breakfast whenever I was on the go. I also love these pastry shells because they're so versatile and you can put anything you want in them. Hope you enjoyed this recipe and leave a comment below if you try this recipe out!


Nibble Away,

            Jo

Saturday, 29 November 2014

How To: Ginger Cupcakes with Orange Cream Cheese Frosting

Hey Nibblers!

           I haven't had many gingerbread cookies in my life. It was never love at first taste for me. I love the way the cookies are decorated but, never craved the ginger goodness. But with Christmas only 27 days away, I suddenly had a craving for a gingerbread cookie. So, instead of heading to a bakery for my fix I thought I would make my own twist on the classic gingerbread cookie with the only way I know how, in cupcake form. I love how these cupcakes turned out. The ginger flavour is pungent and ties in nicely with the the cream cheese frosting to give a sweet, sour and tangy taste all in one bite.


How To:  Ginger Cupcakes with Orange Cream Cheese Frosting


Yields 12-14 cupcakes
What you'll need:
Ginger Cupcake component:
- 230g of self raising flour (sifted)
- 100g butter softened to room temp
- 150g of raw brown sugar
- 2 eggs
- 1 Tbs. ginger powder
- 3 tsp. vanilla essence
- 250mL of milk
- 2 tsp. baking powder

Orange Cream Cheese Frosting:
- 200g softened cream cheese
- 3 Tbs. of orange juice
- 1/4 cup of mixed dried fruit

How To:
The perfect rise
Ginger Cupcake:
1. Pre-heat oven to 180 degrees Celcius / 350 degrees Farenheit
2. Line cupcake tin with patty pans / grease tin
3. Beat butter and sugar together until well incorporated
4. Add eggs and mix
5. Add vanilla essence, baking powder and mix
6. Add about half flour and milk and mix until well combined
7. Repeat step 6
8. Beat for a further 2 minutes to ensure all ingredients are fused well together
9. Divide batter into lined cupcake tin
10. Pop into the oven for 16-18 minutes or until cooked (check using the toothpick method at 16 minutes)
11. Let cupcakes cool for 5-10 minutes before frosting!

Orange Cream Cheese Frosting Ready
Orange Cream Cheese Frosting:
1. Beat cream cheese until it becomes creamier in texture (about 5 minutes)
2. Add orange juice and beat until well combined
3. Add mixed fruit and beat until well incorporated
4. Spoon a tsp. or two on top of eat cupcake then consume!
         Note: If you feel the frosting is too liquified for your taste, beat in a Tbs. of icing sugar until your preferred consistency or alternatively, refrigerate frosting for 5-10 minutes before serving to ensure the frosting holds its shape

          Hope you enjoyed this #CountdownToChristmas recipe. After the success of these cupcakes, I officially have an appreciation for ginger. They have converted me to the ginger loving society. My parents were skeptical at first but, have asked for me to remake these again which means they can covert the toughest of the crowds. If you do give these a try, be sure to comment below as I would love to hear your thoughts!


Nibble Away,
       
               Jo.

Friday, 21 November 2014

How To: Mini Quiche

Hi Nibblers!

         I still remember the first time I ever made quiche. It was in my food technology class in high school. I had never tasted quiche nor knew how to pronounce it properly. Since that lesson, I have made the recipe over and over again until I quiche-d out! Until one day, Mum came home with a home-made quiche her friend had prepared earlier. It was the best quiche I had ever tasted so I decided to recreate it. I love how this recipe turned out. It's a little bit different as I added ingredients that I enjoyed but, that's the fun with quiche. You can make it your own and still be able to please the crowd. These mini quiches will be a great nibble and a lovely addition to my #CountdownToChristmas series.

How To: Mini Quiche


Yields approximately 48 mini quiches
      Note: You can make quiches in advanced and freeze them until needed. Just freeze unbaked quiches in cupcake tin to hold their shape. Remove from the tin and store them in a tightly sealed bag to minimise storage space.
What you'll need:
- 1 Tbs. mixed herbs
Stretch pastry moulds
- 300 mL thickened cream
- 200g sliced olives
- 50mL milk
- 6 eggs
- Egg yolks (for pastry egg wash - 1 yolk per dozen quiches)
- 100g wilted spinach
- 1 diced small capsicum
- 200g diced bacon (substitute for whichever poultry you prefer i.e. roast beef)
- 100g diced ham (substitute for whichever poultry you prefer i.e. shredded chicken)
- 150g grated cheddar cheese
- 6 x puff pastry sheets (each sheet is sliced into 9 squares)

How To:
Filled pastry cups
1. Pre-heat oven to 150 degrees Celcius / 300 degrees Farenheit (fan-forced in applicable)
2. Grease cupcake tin with oil spray to stop pastry from sticking
3. Beat eggs in a large mixing bowl
4. Add herbs, cream, olives, milk, spinach, bacon, ham and cheese to eggs and mix until well combined then set aside
5. Grab a 1 x 9 square of puff pastry and stretch edges until they fit into cupcake tin
6. Repeat step 5 until all cupcake tin is filled
7. Fill each pastry square mould with about 1 and a half Tbs. of filling - about 3/4 way up each mould until finished
8. Brush a bit of egg wash on the corners of each quiche
9. Pop into the oven for 30 minutes
10. Leave to cool for 5-10minutes before nibbling away!

        This recipe is so easy to make and tastes delicious. As I said earlier, you can add whatever you like. Diced carrots, zucchini, corn kernels or mushrooms, you name it.  If you feel like there's too many ingredients and not enough saucy goodness, add a splash of milk and an egg! It won't change anything apart from yielding a larger portion of mini quiches so, have a few extra puff pastry sheets handy. Hope you enjoyed this recipe and be sure to leave a comment below if you've tried this recipe out or about your best quiche experience.


Nibble Away,
         
              Jo

Friday, 14 November 2014

How To: Fairy Cupcakes

Hey Nibblers!

         Nothing makes me happier than the sight of fairy bread at a party. Yeah sure I'm an adult now but, who can resist? It reminds me of the days I was a kid. For those that are not familiar with this little piece of awesome it's a slice of heavenly white bread smeared with butter and sprinkled with 100s & 1000s and cut into four triangles. Sounds simple but, this Aussie delicacy will be sending you bananas for more. My next #CountdownToChristmas recipe will be my spin on this food classic. So without further adieu, I present to you ...

How To: Fairy Cupcakes


What you'll need: 
Fairy Cupcake:
- 100g unsalted butter (softened to room temperature)
- 200g of 100s & 1000s (150g for cake batter and 50g for sprinkling before baking)
- 2 eggs
- 3 tsp. vanilla essence
- 1 cup of sugar or 200g of sugar
- 220g of sifted self-raising flour (or plain flour with a pinch of salt)
- 2 tsp. baking powder
- 1 cup of milk or 250mL of milk
For pink coffee cream frosting:
- 5 tsp. instant coffee
- 2 tsp. boiling water
- 3 Tbl. of milk
- 1 tsp. vanilla extract
- 100g sifted icing sugar
- 250g unsalted butter (softened to room temperature)
- 3 drops of pink food colouring

How To:
Yields approximately 12-15 medium sized cupcakes
Fairy Cupcake:
1. Line cupcake tin with patty pans or spray with oil
2. Pre-heat oven to 180 degrees Celcius or 350 degrees Farenheit
3. Beat butter and sugar until well combined
4. Add eggs and beat
5. Add vanilla essence, baking powder, milk and flour and mix until well incorporated
6. Fold 150g of 100s & 1000s into the batter
7. Divide evenly into patty pans (about 1/2 to 3/4 of the way up)
8. Sprinkle a pinch of 100s &1000s from remaining 50g onto each cupcake
9. Pop into the oven for about 16-18 minutes, checking with a toothpick to see if it's cooked (toothpick should come out clean)
10. Let cupcakes cool down for about 15 minutes before frosting

Pink Coffee frosting:
1. Mix instant coffee with water until well combined then set aside to cool
2. Beat butter until it becomes a pale, off white colour (takes at least 10 minutes, the paler, the better)
3. Mix vanilla essence and milk into butter
4. Add icing sugar and mix until well incorporated
5. Add coffee into butter cream
6. Add pink colouring into butter cream and mix until well combined
7. Beat for an extra five minutes to ensure all ingredients have moulded together
    Note: If you wanted thicker buttercream texture, slowly add icing sugar until desired texture.
              If you wanted thinner buttercream, add 1 Tbs. of milk until desired texture
8. Decorate cupcakes!
   

           The #CountdownToChristmas is getting so real! About six weeks away and shopping centres are already crowded. Hope you enjoy this fun Fairy Cupcake recipe. Remember to comment below or tag me @nibblejo_x if you make these. OR better yet, why not try making Fairy Bread if you haven't tried it? It'll be a life changer.

Nibble Away,
            Jo

Friday, 7 November 2014

How To: Bánh Patê Sô (Vietnamese Pastry Pie)

Hey Nibblers!

           Christmas is coming! Stress levels may be raging this time of year but, it's my favourite time of year. I love it for the food, the lights, the buzz and being able to sit down and relax with family. To celebrate, I wanted to post as many finger-licking recipes as possible for the #CountdownToChristmas!!
          This first recipe is one of my all time favourite things to make for a party or as a road trip snack. They're easy to make, so many different variations to choose from and always a crowd pleaser. 'Patê Sô' or also known as 'Pate Chaud' are French inspired and traditionally consisted of a pork filling with a flaky pastry exterior. They can be found in many Vietnamese bakeries and chicken and beef fillings are now also widely used. My aunty makes banging Patê Sô but, I've since adopted my own version and twisted it Nibble Nation style.

How To: Bánh Patê Sô


Yields approx. 90-108 Patê Sô pieces for every kilo of mince meat
Recipe below will yield approx. 54 Patê Sô pieces as I'm only using 500g of mince. Just double content if you want a larger yield. 

What you will need: 
Pastry sheet cut into 9 squares
- 6 sheets of ready to use puff pastry (You'll need at least 10-12 sheets if you're using a kilo of mince.)
- 500g of chicken mince (any other mince (pork, beef etc.) will work well)
- 2 Tbs. soy sauce
- 1 1/2 Tbs. garlic salt
- Approx. 420g of corn kernels and peas (canned or frozen. If canned, drain excess juices)
- 1 1/2 large onions, diced (The more onions, the more moist the mince comes out)
- 2 tsp. pepper
- 3 egg yolks (One egg yolk can wash about 20 Patê Sô pieces so all depends on how many you want to bake in one go)

How To:
Marinated mince
1. Mix chicken mince, soy sauce, garlic salt, pepper, diced onions, corn kernels and peas together until well combined and then set aside to marinate for at least and hour
2. Leave puff pastry sheets to defrost for about an hour before use to make it more pliable
3. Pre-heat oven to 150 degrees Celcius or 300 degrees Farenheit fan-forced about 30 minutes before baking
4. Cut puff pastry sheet into 9 relatively equal square pieces
5. Add one heaped tsp. of marinated mince into the middle of the puff pastry square
6. Fold diagonal corners together to form a triangle and press firmly to ensure pastry is sealed on all sides
7. Using a fork, decorate edges to create grooves for visual purposes (optional)
8. Repeat steps 4-7 until pastry/ marinated mince is used up
             Note: you can make Patê Sô pieces in advanced and freeze them until you need them. No need to defrost, just give them a quick egg-wash, pop them into the oven and they're as good as a fresh batch.
9. Break adequate amount of egg yolks to wash over pastry to achieve the amazing golden brown colour (Use those egg whites for some healthy scrambled eggs or a mousse.)
10. Pop into the pre-heated oven for about 25 minutes or until golden brown and enjoy!

One heaped tsp. into the centre of each square
Seal those corners by pressing firmly
Decorate the triangle Patê Sô
Egg washed and ready for baking!
Eat me!
         These taste amazing and I can't help but gobble a few when they're piping hot. I also love that I can make these in advanced and bake them whenever I need them. So, when I know I have guests coming over or a party coming up and know I'll be stuck at work, I just make a bunch in bulk a week ahead and bake them for when I need it. People will definitely woo over them and think you got down and dirty to make these.
         Hope you enjoyed the first recipe of my #CountdownToChristmas series! Be sure to leave a comment below if you have any questions or if you have tried this recipe out for yourself.

Nibble Away,
          Jo
Related Posts Plugin for WordPress, Blogger...