Showing posts with label Easy. Show all posts

Wednesday, 13 April 2016

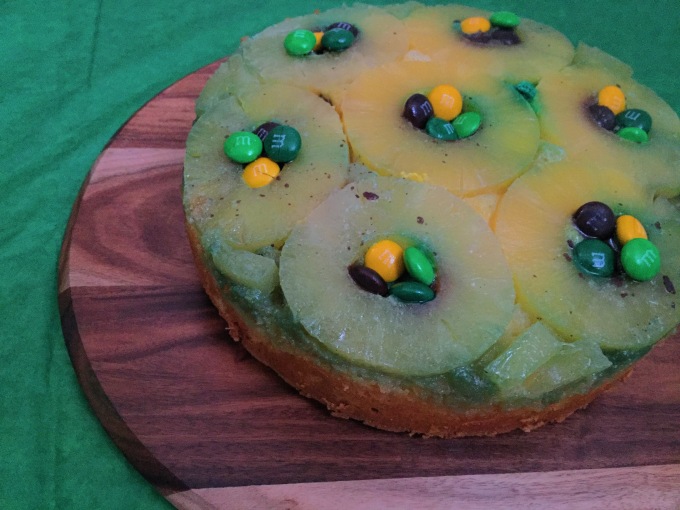
How To: Pineapple M&Ms Upside Down Cake

Hi Nibblers!

        A few weeks ago, Kevin's Dad turned 50! I didn't have much time to prepare as shift work had my hours all over the place so I needed a cake that was easy and delicious. My only brief was to make it fruity. I was thinking of no bake desserts but nothing really stood out in my mind and mostly incorporated rich chocolate flavours. I rummaged through the pantry and stumbled across a can of pineapples. 'That's it!' I thought and it was then the recipe was born.
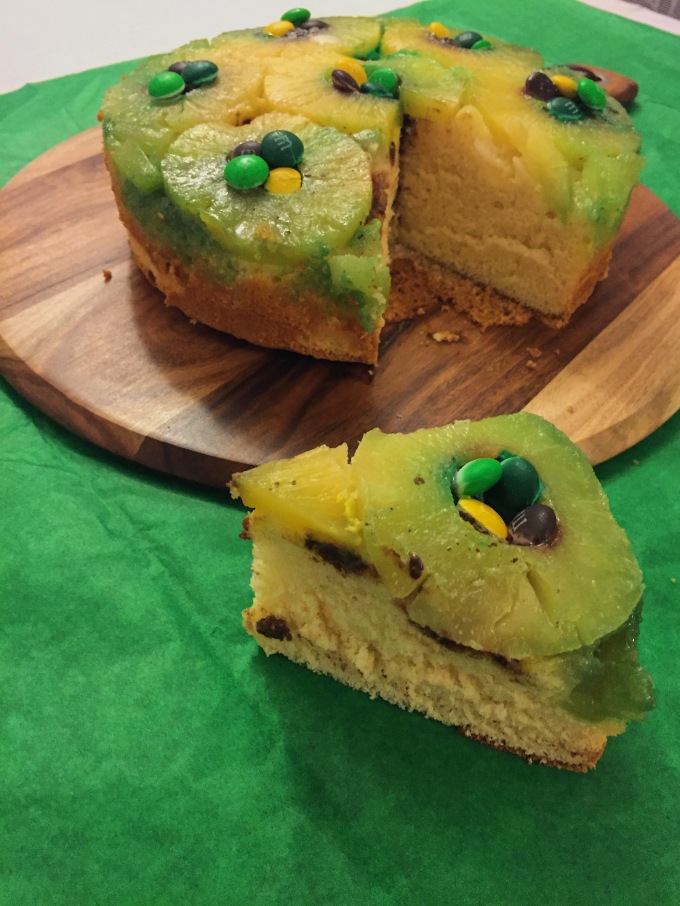
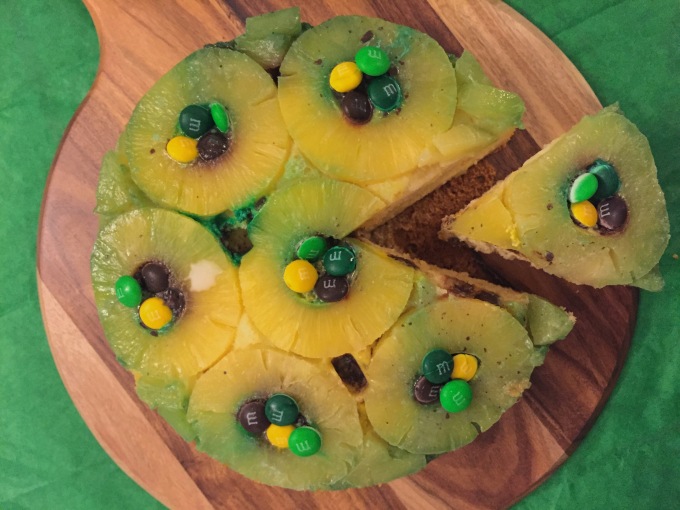
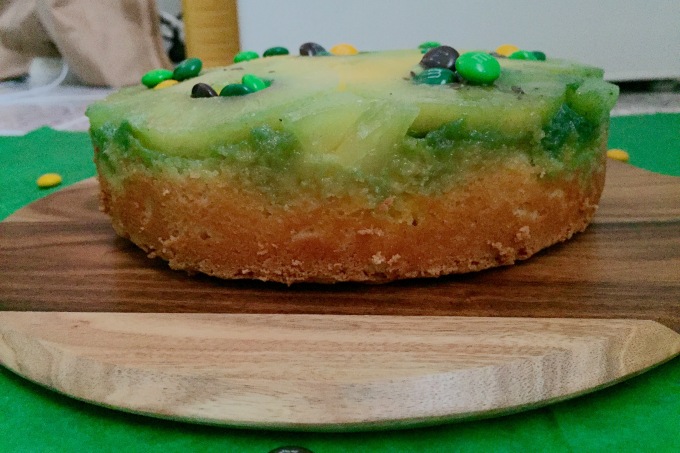
        This cake turned out moist and with the slight tartness of the pineapple it ticked all boxes. I added pineapple flavoured M&Ms to the cake for decorative purposes however felt it took away from the natural flavours so feel free to omit that completely. I did pop some in the pan while it was baking but the M&Ms melted hence gave the cake a green hue. I can definitely say it worked in theory but was probably not my best idea. All in all, still a great tasting cake and definitely one you should make if you're short on time!
 

How To: Pineapple M&Ms Upside Down Cake
FullSizeRender
Makes one 20cm tin cake - serves 8-10
What you'll need:
- 525g of tinned pineapple rings (in pineapple juice)
- 3 eggs (separated)
-150g or 2/3 cup of sugar
- 150g or 1 cup of self raising flour
2 tsp. Vanilla essence
- 100mL pineapple juice (from can)
- 30g unsalted butter (melted)
- 30g brown sugar
- 100g Pineapple flavoured M&Ms (optional)
 
How To:
1. Place melted unsalted butter into baking tin and spread even around sides
2. Sprinkle brown sugar evenly on base of tin then set asideIMG_2395
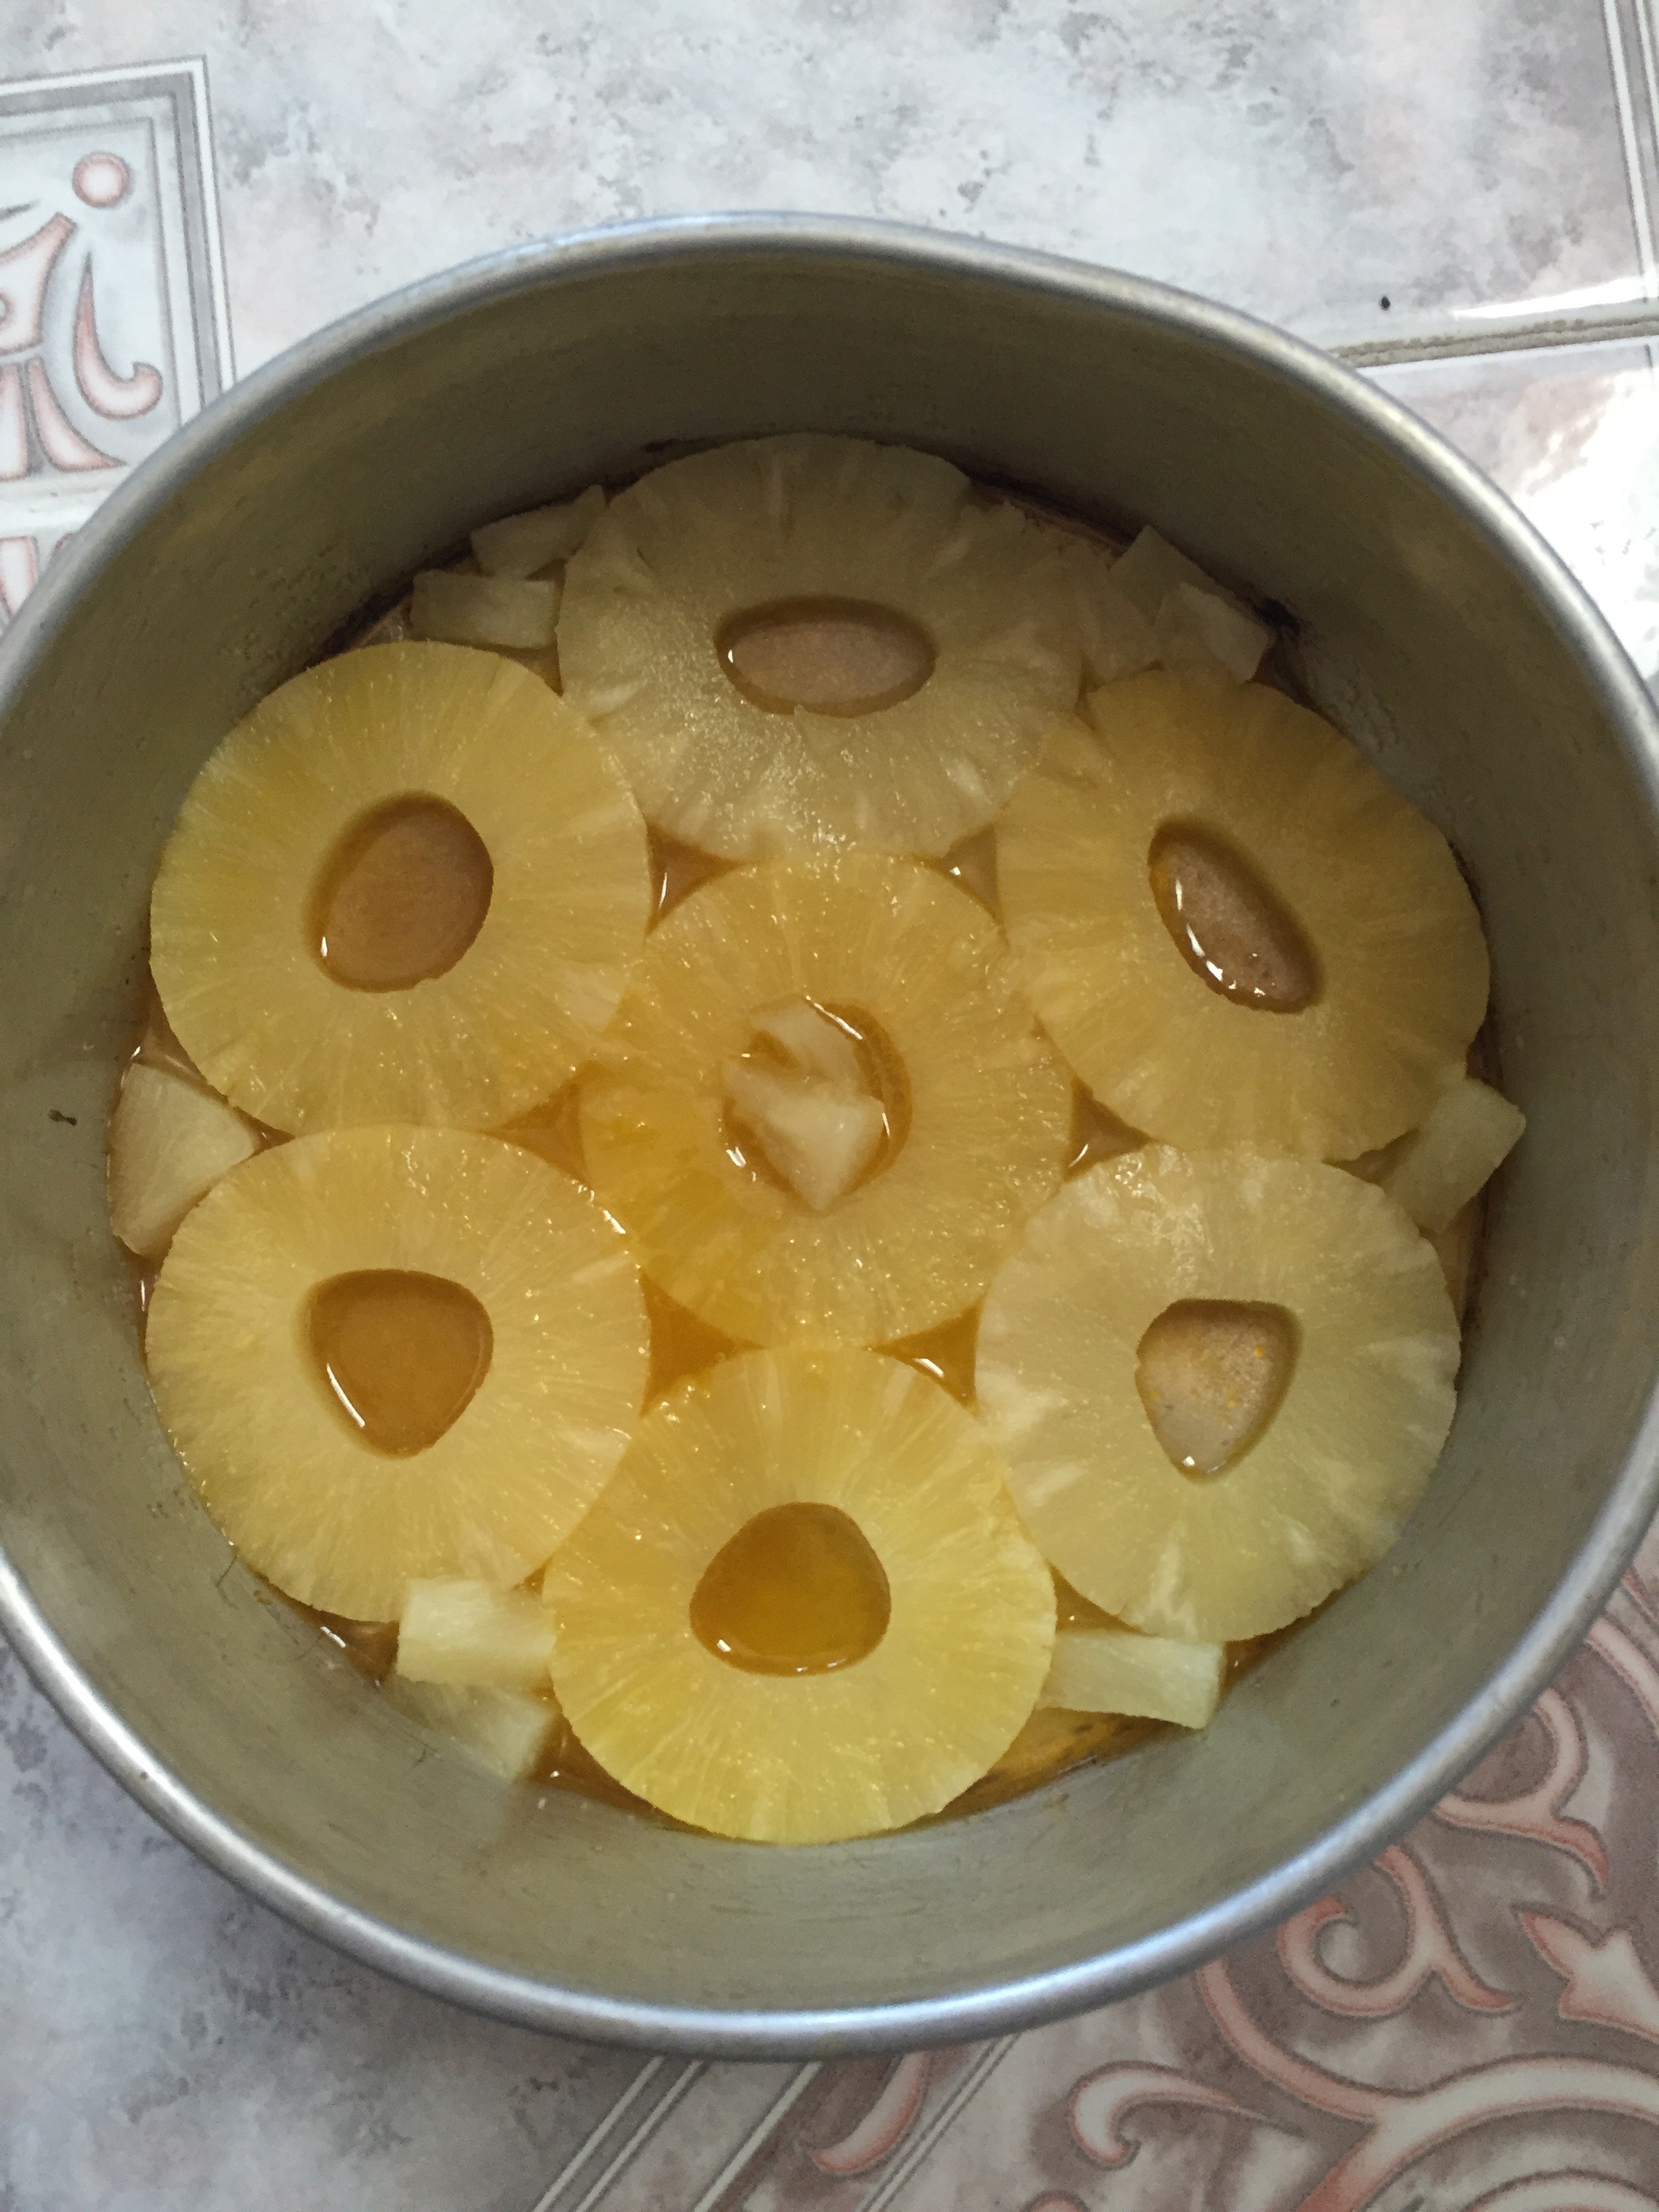
3. Line pineapples rings on base of cake tin to cover all covers (Optional: Place M&Ms in any empty spaces) then roughly dice remaining pineapple pieces then set aside
4. Preheat oven to 180 degrees Celcius or 375 degrees Farenheit
5. Beat separated egg whites on high until fluffy then add 2/3 cups of sugar and continue beating until stiff peaks form then set aside
6. In a seperate bowl, mix egg yolks, vanilla essence, remaining pineapple pieces and pineapple juice until well combined - (Optional - add remaining M&Ms)
7. Slowly fold in flour and beaten egg white/sugar into yolky mix approximaIMG_2394tely a third of each mixture each time until all well incorporated
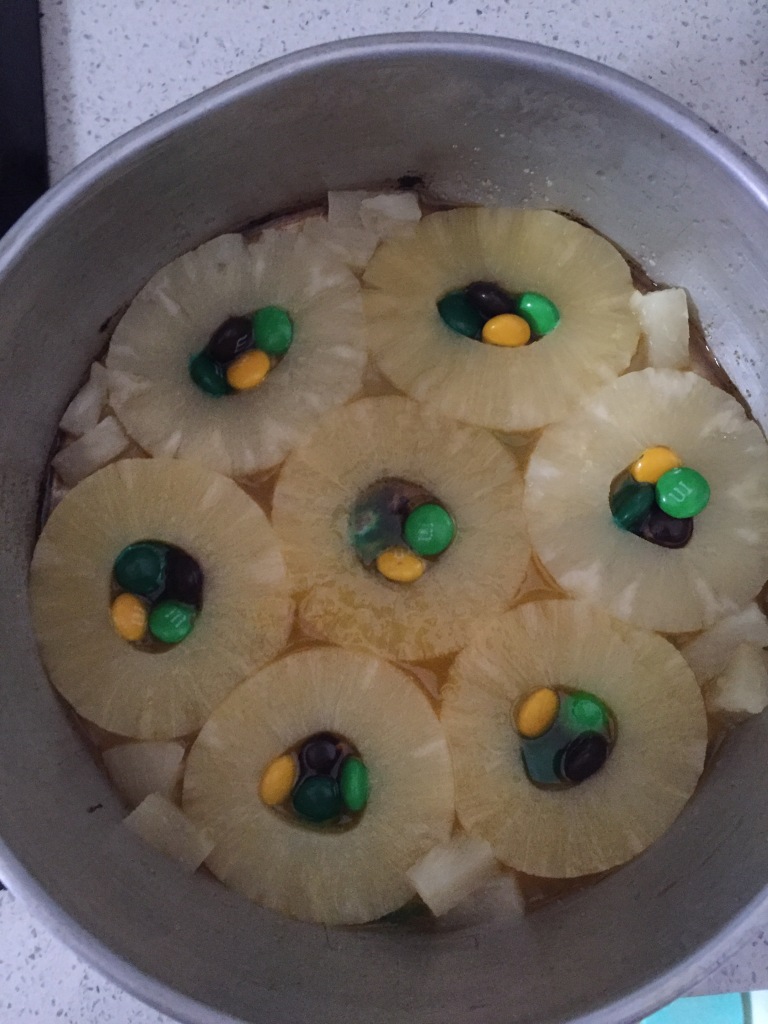
8. Pour cake mixture evenly into tin
9. Pop cake into oven for approximately 30 minutes or until skewer pops out clean
10. Remove from oven then leave to cool for 10 minutes then remove from tin before serving
 
              I loved the end result of this cake. Made in no time and the sponge was oh so soft. It definitely received some rave reviews. If you do give this a go please make sure to leave a comment below letting me how you go!
                Before I end this post, I also wanted to say thank you for sticking by me for the past three years. I've enjoyed every bit of it and it's been amazing to see how much I've improved in these few years. To celebrate, I have decided to move Nibble Nation to a new platform - Wordpress. All my old content has all been imported over and I will no longer be posting to my blogspot account. So, you'll still be able to access everything I have ever posted. If you haven't already and would like to follow me on the next chapter, head to nibblenation.wordpress.com ! I hope to see you there and hope you like the look. It was hard work to start off with but I'm loving the templates on Wordpress and believe things can only improve here on in.
                 FullSizeRender 
FullSizeRender
FullSizeRender
Until next time

            Nibble Away,

                            Jo

Sunday, 6 December 2015

How To: Lindt Lindor Peppermint Stuffed Red Velvet Cookies

Hi Nibblers!

        It's December! When I hear people say how quickly the year goes by, I didn't feel it much. But ever since leaving uni and working full-time, the year goes by at lightning speed. The festive season is definitely more stressful in adulthood because I can't seem to find a time where shops are open when I'm off work. Luckily, I had a few hours on hand and headed to the shops to window shop for present ideas. I stumbled upon 'Lindt Lindor Peppermint - Christmas Edition' truffles. I had been wanting to do a mint related recipe for a while but couldn't find the oomph I was looking for until now. I quickly popped back home and started baking. Keep reading ahead to find out how!

How To: Lindt Lindor Peppermint Stuffed Red Velvet Cookies
Makes: Approximately 20 cookies 


What you'll need:
- 250g unsalted butter (softened to room temperature)
- 400g plain flour - all purpose
- 4 tsp. vanilla essence
- 40g cocoa
- 2 tsp. baking soda
- 2 Tbs. milk
- 2 eggs
- 2 tsp. red food colouring
- 180g brown sugar
- 1/2 cup white chocolate chips
- 250g of Lindt Lindor Peppermint
Optional: For decoration
- Handful green sprinkles
- 3 large candy canes - roughly chopped

How To:
1. Beat butter until smooth and creamy
2. Add white and brown sugar and beat until well incorporated
3. Add vanilla, eggs, milk and red food colouring
4. Mix in baking soda, flour and cocoa
5. Add choc chips and stir until mixed
6. Pop cookie dough into the fridge for at least an 1/2 hour
        Note:  This step is essential if you want soft,  pillowy, risen cookies. It allows the cookie dough more pliable and less sticky

7. Pre-heat oven to 180 degrees Celcius or 350 degrees Farenheit
8. Remove all Lindt Lindor Peppermints from their wrappers then set aside
9. Roll a heaped Tbs. of cookie dough into a ball before flattening it out in the palm of your hand to form a pancake shape then place Lindor in the centre dough before covering the whole Lindor truffle with cookie batter
10. Place onto lined baking tray about 5cm apart from one another
11. Pop into the oven for 11-12 minutes
11. Take cookies out of the oven then lightly press down on each cookie 
12. Decorate cookies with sprinkles and crushed candy canes 
13. Allow cookies to cool on baking tray for 5 minutes before transferring to cooling rack then devour!
        Note:  Store cookies in an airtight container for up to 7 days. Cookie dough and cookies can be frozen for up to 2 months and thawed (for eating) or baked frozen (but need an extra 2 minutes in the oven)


          This recipe is definitely for those choc mint lovers out there. The cookies are crunchy on the inside and chewy soft in the centre. The crushed candy canes are a surprise crunch which I really like. These are so easy to make and taste great even without the Lindor centres. Leave a comment below if you give this a try :)


Nibble Away,
         
               Jo

Monday, 30 November 2015

How To: Cookies and Cream Kit Kat Cupcakes

Hi Nibblers!

         I was scanning the aisles of my local supermarket one evening when I stumbled cross 'Cookies and Cream' flavoured Kit Kats. It's always in these moments that recipes come knocking on my door and there's just a vision before me. Luckily enough, I had an occasion to bake for. Sometimes, I want to try things out but there's just not enough friends close by with whom I can give my baked goods to.
         A few weeks ago, I entered the next chapter of my career. For the past eight months, I was on a stepping stone. I learnt valuable skills and was able to figure myself out. I also  made friends with the most wonderful group of people whom supported my baking dreams. They encouraged me to experiment and continue with what I enjoyed. After a few weeks of brainstorming ideas I decided to make my 'Cookies and Cream Kit Kat Cupcakes' come to life as my farewell gift to my friends. I do have to apologise in advanced for the poor photo quality. I had to take pictures at night and my night photography is horrendous. But, I can only go on up from here so bear with me. :)

How To: Cookies and Cream Kit Kat Cupcakes
Makes: 12 cupcakes                                                                                         Duration: approx. 1 hr


What you'll need:
Cupcake Component
- 180g or 1 cup self raising flour
- 50g unsalted butter (softened to room temperature)
- 150g or 3/4 cup sugar
- 2 tsp. Vanilla essence
- 80g or 1/2 cup cocoa powder
- 2 eggs
- 250mL milk
- 3/4 of a (170g back) Cookies & Cream Kit Kat strips (roughly crushed)
- 12 medium sized chocolate choc chip cookies
Vanilla Buttercream
- 250g unsalted butter (softened to room temperature)
- 100g icing sugar
- 1 tsp vanilla essence
- 2 Tbs milk
- 3 Cookies &


Cream Kit Kat strips quartered / remaining strips (optional - for toppers)
- 3 tsp. baking flour

How To:
1. Pre-heat oven to 180 degrees Celcius
2. Line cupcake tin with paper liners or lightly spray tin
3. Place one chocolate choc chip cookie top faced down onto tin into each liner
4. Beat butter and sugar until light and fluffy
5. Add eggs and vanilla essence 
6. In a separate bowl mix self raising flour, cocoa and baking flour 
7. Combine half of the dry ingredients and half of the milk to the wet ingredients then mix until well incorporated 
8. Add second half of dry ingredients and milk to bowl 
9. Place about 3/4 of the crushed Cookies & Cream Kit Kats to mixture and mix until evenly distributed
10. Fill cupcake liners until about half way full
11. Sprinkle remaining Cookies & Cream Kit Kats crumbs onto each cupcake top
12. Pop cupcakes into the oven for 16-18 minutes (ensure skewer comes out clean after cooking time) then set aside to cool
Vanilla Buttercream:
1. Beat butter on high until it turns from a yellow colour to off white tone (takes at least 5 minutes)
2. Add icing sugar and beat until well combined
3. Add vanilla essence and milk and beat for at least another 3 minutes on high
            Note: for a thicker buttercream add a Tbs of icing sugar until desired texture
           For a softer buttercream, add a Tbs of milk until desired texture

Let's Decorate!
Once cupcakes have cooled completely, I used a closed star tip and followed the edges of the cupcake before coming into the centre. I then placed a Kit Kat block on top to finish the look!
Decorating is always the fun bit so let your creative juices flow and do whatever please you. 

I hope you Nibblers enjoyed this recipe! I've been brainstorming ideas for the Christmas season so watch this space in the coming weeks. 


Until then,
Nibble away,


                 Jo

Sunday, 24 August 2014

How To: Strawberries and Cream Cupcakes

Hi Nibblers!

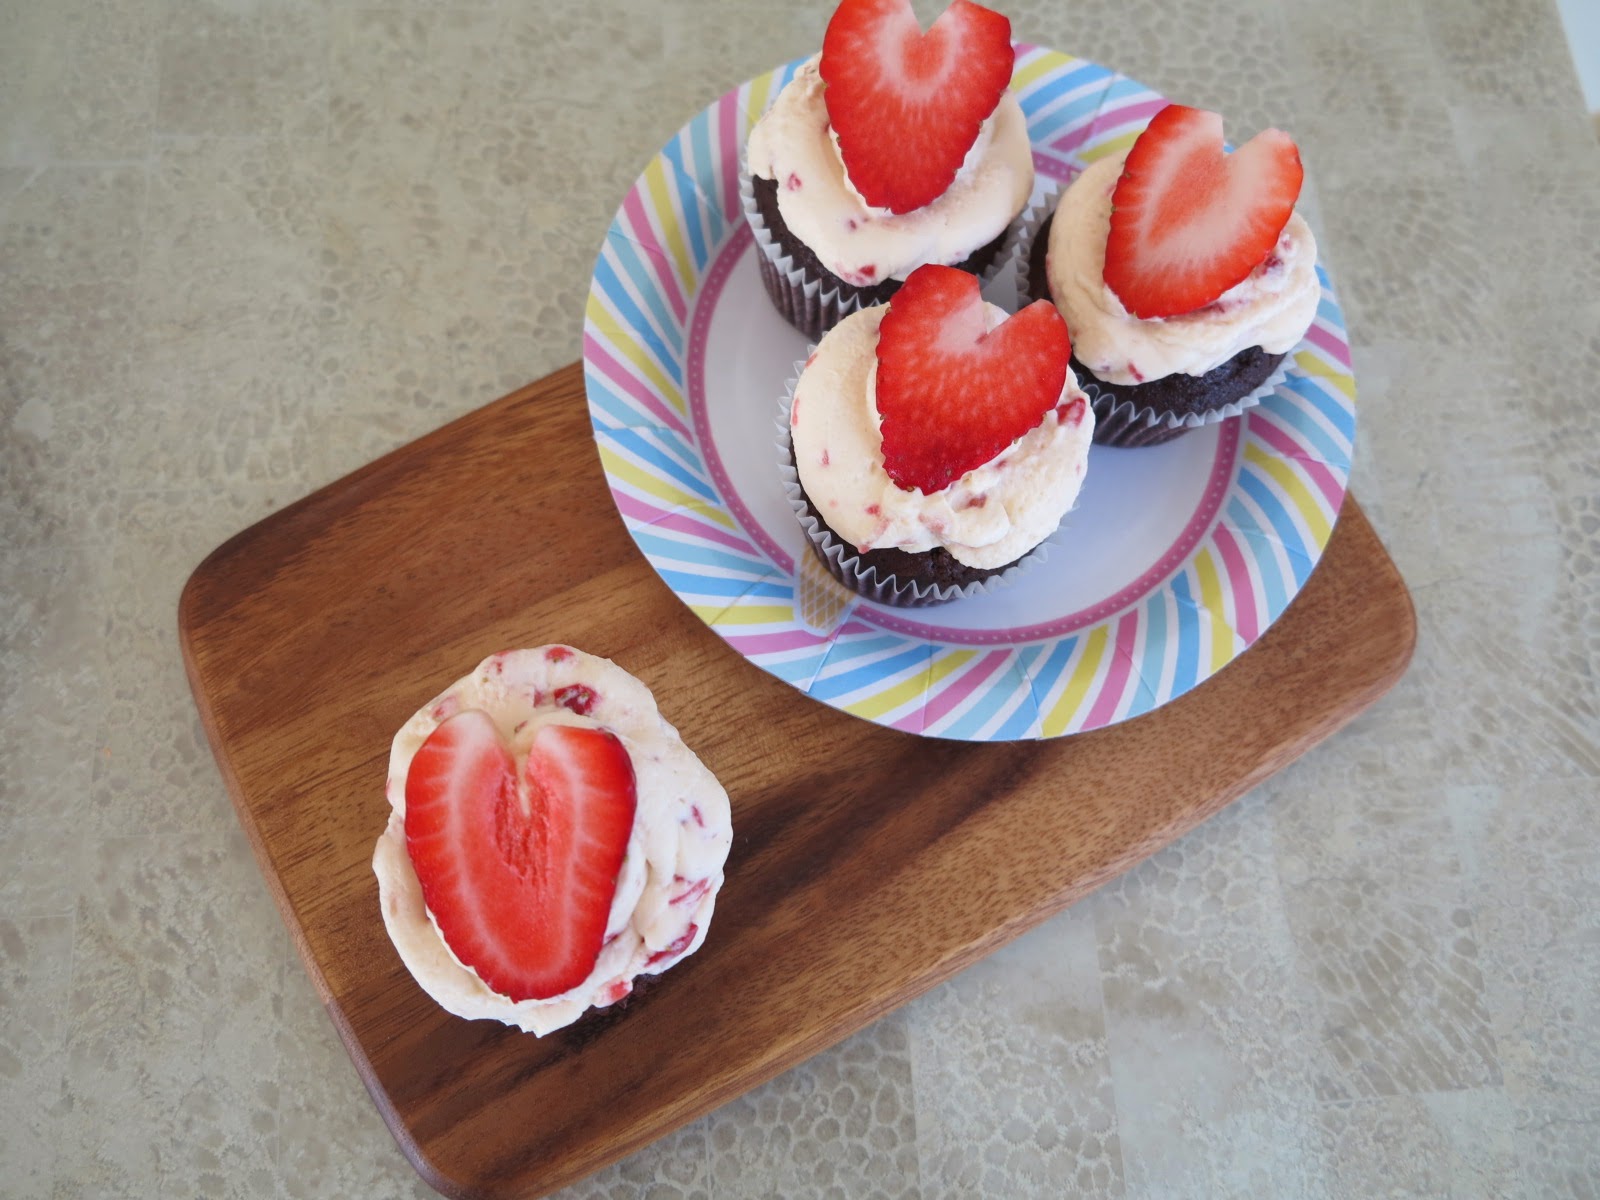
         Spring is only a week away for those of us in the southern hemisphere. To welcome the months of hay fever, flowers and sunshine I decided to whip up a batch of 'Strawberries and Cream' cupcakes! These cupcakes are extremely easy to make and will not only look great on a plate, each one cupcakes comes with a special surprise. To top that all off, strawberries are selling at great prices in Sydney right now which makes it the perfect time to test these babies out.

How to: Strawberries & Cream Cupcakes


Yields 12-14 medium cupcakes

What you'll need:
Cupcake component
- 1 cup or 180g self-raising flour (plain flour will work just
remember to add a pinch of salt)
- 2 tsp. of baking powder
- 1/2 cup or 80g of cocoa powder
- 50g butter (softened to room temperature)
- 3/4 cup or 150g of sugar
- 2 eggs
- 1 cup or 250ml of milk
- 3/4 tsp. Vanilla Essence
- 12 Lindt strawberries and cream truffle balls
- 6 strawberries roughly sliced

Strawberry cream frosting component
- 4-5 strawberries roughly diced
- 300ml of thickened cream (or whipping cream)
- 3 Tbs. of sugar
- 1 tsp. of vanilla essence

How To: Cupcake
1. Pre-heat oven to 180 degrees Celcius
2. Line tin with cupcake patty pans
3. Sift together flour, baking powder and cocoa in a medium mixing bowl then set aside
4. Beat together the softened butter, vanilla essence and white sugar in a large mixing bowl until well combined and fluffy (approx. 3 minutes)
5. Add eggs in one at a time and mix 
Strawberry & Chocolate batter
6. Add 1/2 of the dry ingredients and 1/2 of the milk into the butter/sugar mixture and mix
7. Repeat step 6 until all ingredients are all combined
8. Add sliced strawberries and gently mix until well incorporated
9. Spoon about 2 Tbs. of the cupcake mixture evenly into each of the lined patty pans
10. Add  Lindt truffle into the centre of each patty pan
11. Add a further 2-3 Tbs. of batter into patty pans or until it fills up to the 3/4 mark
12. Pop into the oven for 18 minutes checking with a skewer at the end to see if it's cooked
13. Rest the cupcakes for 15-20 minutes

How To: Strawberry cream frosting
1. Pre-chill your mixing bowl and cream in the fridge to minimise the chance of your cream splitting
2. Beat cream, sugar and vanilla essence until soft peaks form (about 4 minutes using a hand/ stand mixer)
3. Add diced strawberries and continue mixing until desired texture (about 2 minutes). I like the frosting to be quite stiff because it holds more shape when piped onto the cupcakes
4. Decorate your cupcakes

       I made the mistake of pushing my Lindt truffles to the bottom of the patty pan so most of the cupcakes didn't have the oozy effect when cross-sectioned. However, they tasted delightful and thoroughly enjoyed.

Don't push those truffles to the bottom!
Truffle sunk and burst itself at the bottom of the patty pan

Batman
     

       I would also love to thank Kevin for making my baking adventures much more enjoyable by spoiling me with Batman, my new KitchenAid stand mixer! I'm so excited to use it and can't wait to share more recipes with you.
     
        Hope you enjoyed this post and leave a comment if you gave this a try.


Nibble Away,
         
            Jo

Friday, 8 November 2013

How to: Banana Cupcakes

Hey Nibblers!

         I know I've already posted a banana cake recipe but since then, I've started experimenting and after three successful attempts, I just had to share it with you all. It's such a quick recipe that doesn't take much of your time. It's moist and stays light and fluffy the next day. Even if you refrigerate them, just pop them into the microwave for about 30 seconds (depending on how strong your microwave is) and they'll be as amazing as if you just baked them!
          My Mum is one of my hardest critics but she is also one of my biggest inspirations. She's also a lover of bananas. This recipe has her nod of approval and with that, let's get into this.


What you'll need: (With this recipe, I make about 12 large cupcakes)
       - For the cupcake version bake for 18-20 minutes. Check them using the skewer insertion method
         - For a large cake version bake for 40-45 minutes.


- 1 1/2 cups of self-raising flour
- 1/2 cup of brown sugar
        Add 3/4 cup if you love that extra sugar kick.
- 4 small to medium ripe bananas
- 1 1/2 tsp. of baking powder
- 1 Tbs. cinnamon spice
- 1/3 cup of milk
- 3 eggs
- 180g melted unsalted butter

How to:
1. Pre-heat oven to 180 degrees Celsius (356 degrees Fahrenheit)
2. Line your cupcake tin with baking paper or grease your tin well
3. Mash your bananas until well combined. Large 1cm chunks of banana is fine


4. Whisk your melted butter, milk and eggs in a medium sized mixing bowl until well combined
5. Add your mashed bananas to your whisked wet ingredients and mix until well combined
6. Combine your self-raising flour, cinnamon, sugar and baking powder and mix together so it looks like a dry marinade mix


7. Fold your dry and wet ingredients together until you can't see anymore flour through the mixture or stuck on the side of the bowls


8. Fill your cupcake tin moulds, dividing it into equals amounts
          (I filled mine about 3/4 of the way up)


9. Pop your tin into the oven for 18-20 minutes
10. Rest these babies cool down (if you can) for 5 minutes before devouring
         (They won't stick to the cupcake paper if you let them rest!)


        Hope you give this recipe a try. If you do, be sure to leave a comment! I'll be happy to answer any questions and be happy to try any requests of yours. Hope you're all having a great week.

Nibble away,

                   Jo x.
Related Posts Plugin for WordPress, Blogger...