
Have you ever had something where you just couldn't understand what the fuss was all about? I did. And it was anything Matcha (green tea) flavoured. I couldn't get into it no matter how hard I tried. I was all about that black sesame craze. Until one day, Kevin bought me a Starbucks Matcha Latte while we were on a holiday in the Gold Coast and something just clicked. I was in love.
I couldn't stop thinking about it. I wanted more Matcha flavoured things. As soon as we came back to Sydney, I wanted to dedicate specific days to have Matcha adventures. I stumbled in Chanoma - a Japanese style cafe which did all kinds of Matcha goodness. It became a weekly ritual back in uni where Tree and I would visit just because. It's been a while since I've gone back.
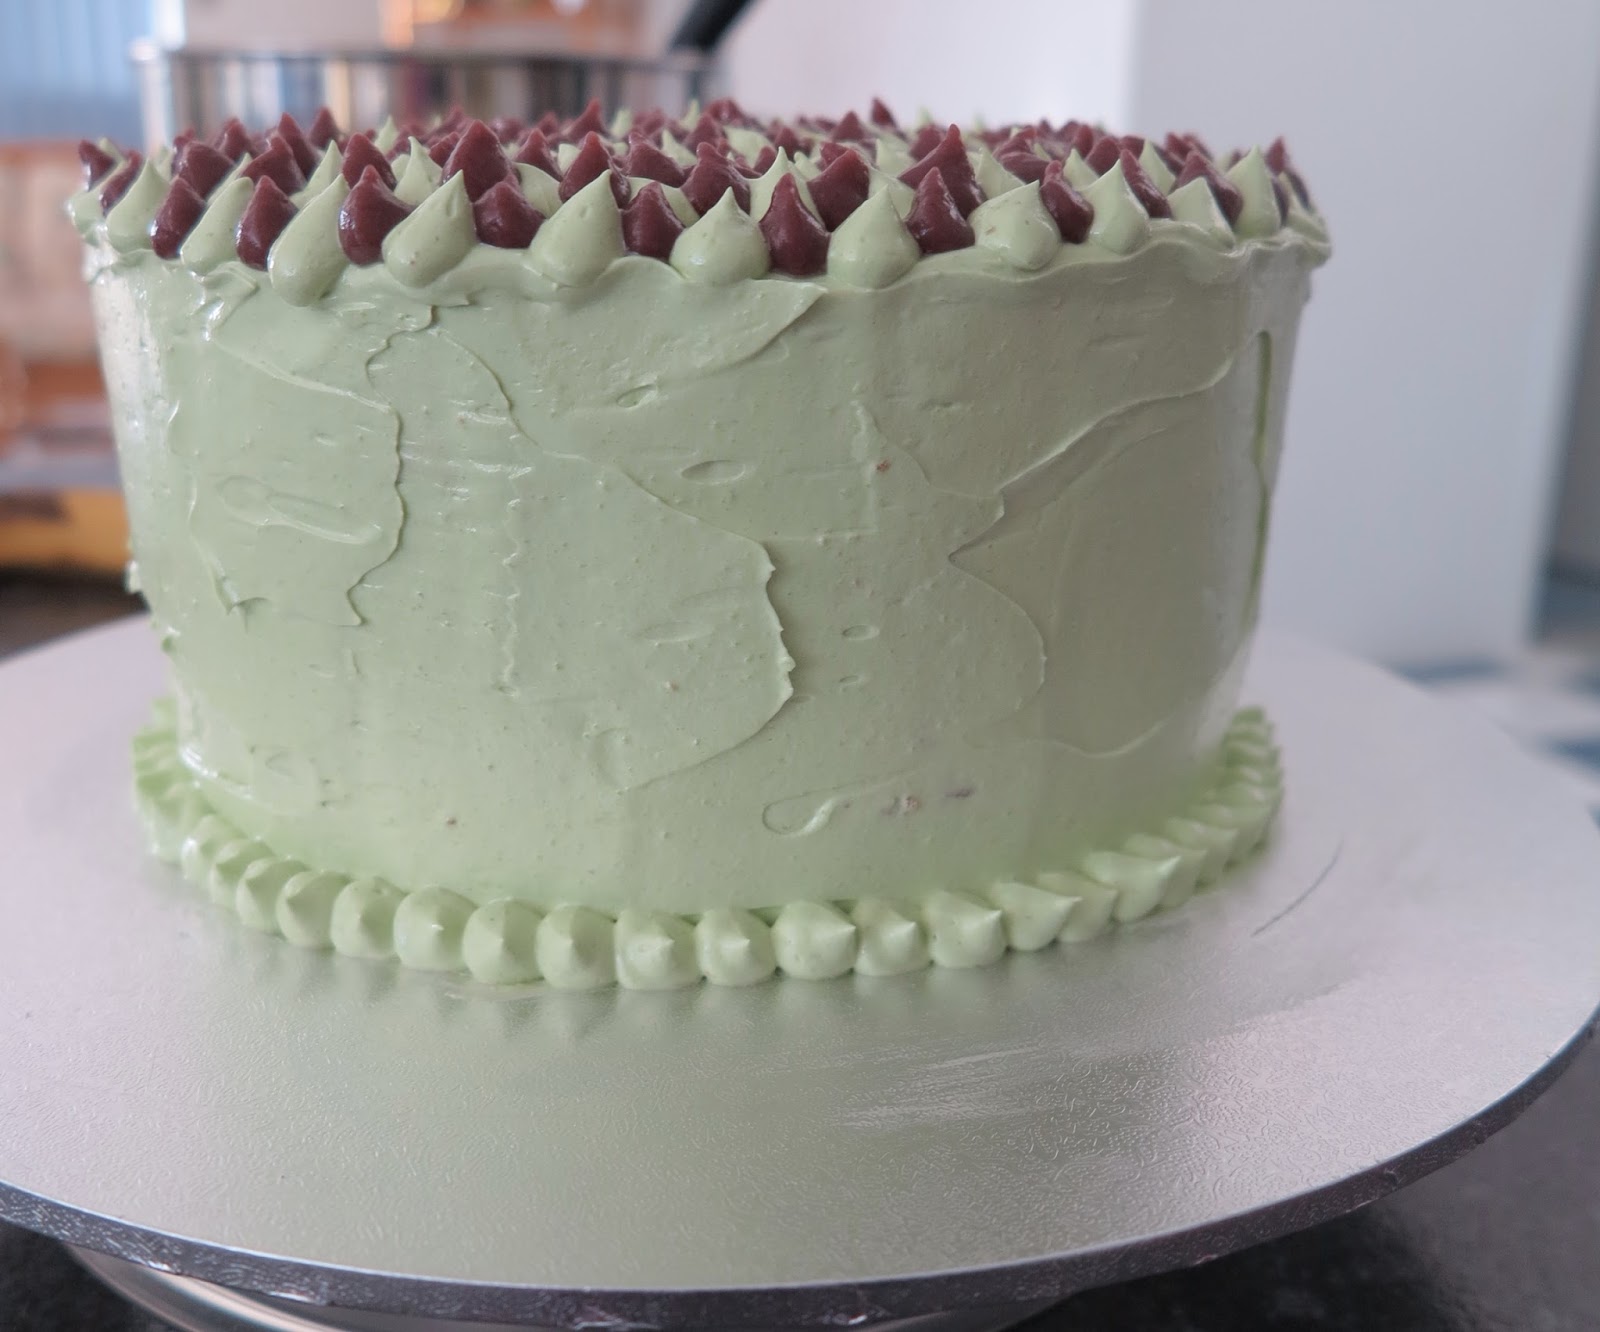
So I've decided to celebrate my love for Matcha by making a cake. I paired the Matcha butter cream frosting with a Red Bean cake - one of the best flavour pairings in this sweet world. Hope you love this little creation!
How To: Red Bean Cake with Matcha (Green Tea) Buttercream Frosting

What you'll need:
Makes a 3 tired cake - Takes approximately 4 hours including cooling / decorating time
Red Bean Cake Component:
- 12 eggs (separated into whites and yolk)
- 1 1/2 tsp. cream of tartar
- 275g of sugar
- 360g self-raising flour
- 180mL of vegetable oil
- 180mL of milk
- 2 tsp. vanilla sugar
- 75g cooked Adzuki - Red Beans * see 'Red Bean Paste' section
- 3 drops of red food colouring - optional
Red Bean Paste:
- 200g Adzuki - Red Beans - soaked for at least an hour before cooking
- 150g white sugar
Matcha (Green Tea) Buttercream Frosting:
- 200g icing sugar
- 500g butter (softened to room temperature)
- 30g Matcha Green Tea Latte Mix
- 2 Tbs. milk
- 1 drop of Green colouring - optional
How To:
Red Bean Paste:
 |
| Ready to be made into a paste! |
1. Boil 500mL of water then add soaked Adzuki Beans into the pot and leave to simmer for approx. 40 minutes with the lid on - stirring occasionally - until beans a soft all the way through
2. Drain beans in a colander and set aside approx 75g of cooked Azuki beans for cake mixture
3. Return the rest of the beans to pot on a low heat then add sugar
4. Stir until well incorporated
5. Pop mixture into a blender and blend until it forms a consistency of peanut butter - takes about a minute in the blender
6. Pour red bean paste into a mixing bowl then set aside to cool to room temperature
Red Bean Cake Component:
1. Pre-heat oven to 160 degrees Celcius/ 320 degrees Farenheit fan forced
2. Line three circular 20cm cake tins with baking paper or lightly spray with cooking oil to prevent cake from sticking to the pan
 |
| Mixing in the Adzuki beans |
3. Beat egg whites until soft peaks form then add sugar and continue beating until it forms a bloody stiff peak finish - approx. 10 minutes of a high beat setting
4. In a separate mixing bowl, beat egg yolks until it changes from a deep orange to a light beige colour - takes approx. 5 minutes
5. Add oil and milk to egg yolk mixture and beat until well incorporated
6. Add vanilla sugar and cream of tartar to the mix and beat
7. Using a spatula, gently fold flour and egg white/ sugar folds in small little increments - it takes time but allows for mixture to stay aerated and soft
8. Continue step 7 until all flour and egg white/ sugar mix is well incorporated
9. Add cooked Adzuki beans and red food colouring to the cake batter and fold until well combined
10. Evenly divide batter into cake tins ensuring all batter is spread evenly along the edges of the cake tin - lightly tap tins on a flat surface if you need that extra push
11. Place tins in pre heated oven for approximately 35-45 minutes - swapping cake tin positions at around 25 minutes to ensure all layers are baked evenly
12. At 35 minutes check if cakes are cooked by placing skewer into each cake layer and skewer comes out clean - if no, leave cakes to cook for a further 5 minutes then check again
13. Allow cakes to rest in tins for 5 minutes then transfer onto cooling rack and set aside until cooked - spread up the process by placing cakes in the freezer for up to an hour
Matcha Green Tea Buttercream frosting:
1. Beat softened butter until it turns from a yellow butter colour to and off white colour - Takes approx. 7 minutes in high
2. Add icing sugar to the mix and beat until well incorporated
3. Add Matcha Latter mix to frosting and well for a further 5 minutes
4. Add milk and green food colouring and beat for a further 5 minutes until well combined
Note: if you feel the frosting is too dense, just add a Tbs. of milk and mix until desired texture
If it's too soft, add a heaped Tbs. of icing sugar to thicken the frosting
 |
| Cake scraps to be eaten, nom |
Once all cakes and pastes are cooked, it's decorating time! Feel free to decorate however you like but if you liked how mine turned out, here's how:
1. Level cakes as identical and flat as possible
2. Place one tier on a cake board then even spread a layer of red bean paste
3. Place 2nd tier on top and spread an even layer of red bean
4. Place 3rd layer of cake then using the Matcha buttercream, evenly coat cake to create a crumb coat layer
5. Place in freezer for 15 minutes to set
 |
| Building my layers |
6. Add more Matcha buttercream to the cake until evenly coated around cake
7. For the top of the cake, place red bean paste in one piping bag and Matcha buttercream in another then pipe a small blob around the edges of the cake alternating between the two colours
 Note: If you ever find yourself with left over red bean paste or buttercream frosting, pop them in seperate air tight containers and freeze for up to two months or a week in the fridge! Just defrost and use for your next batch :)
This cake was moist and delicious. I love the sweetness creaminess of Matcha buttercream teamed with the dense sweetness of the red bean paste. I loved this cake and it definitely put me back into the Matcha craze. If you do give this recipe a try, make sure to comment below and let me know how you do!
P.s. I have more cakes coming your way so stay tuned!
 |
| Inside snap! |

Nibble Away,
Jo
No comments:
Post a Comment